


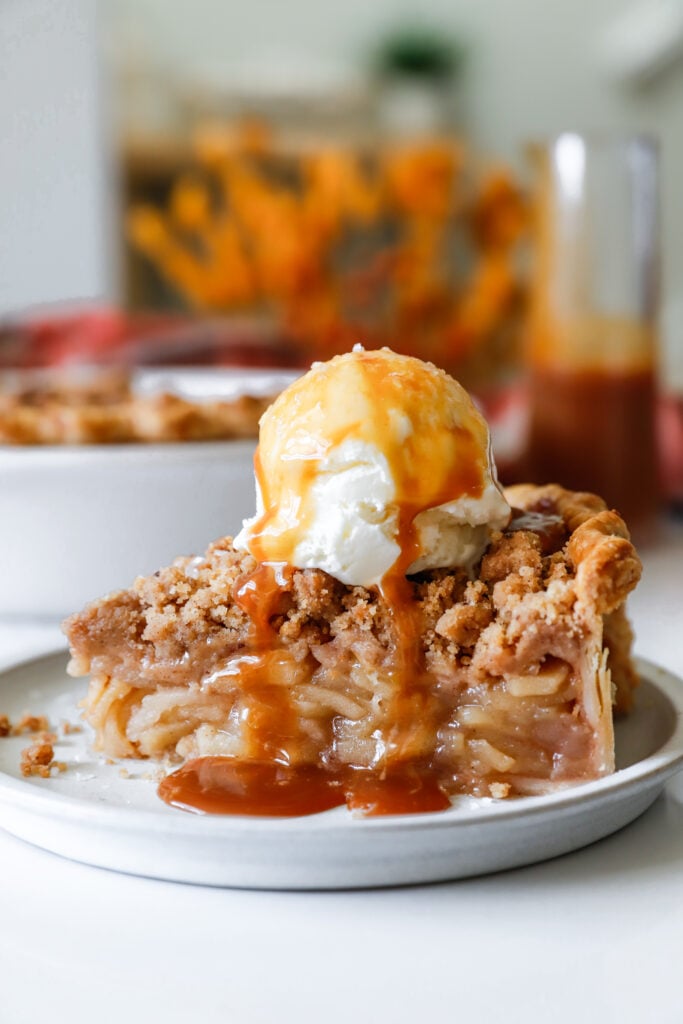
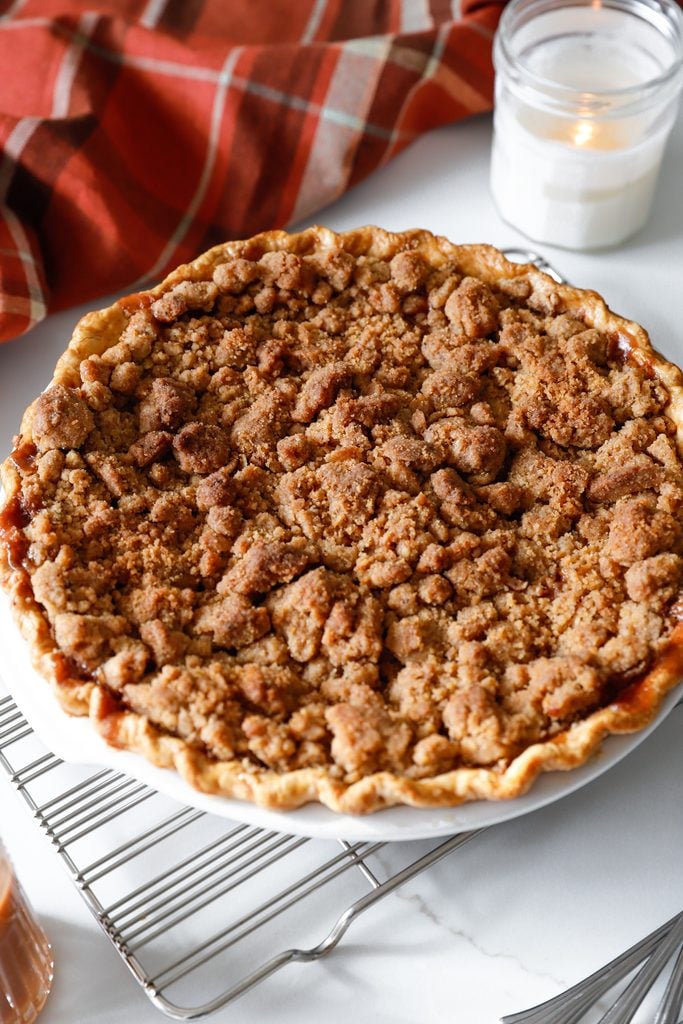
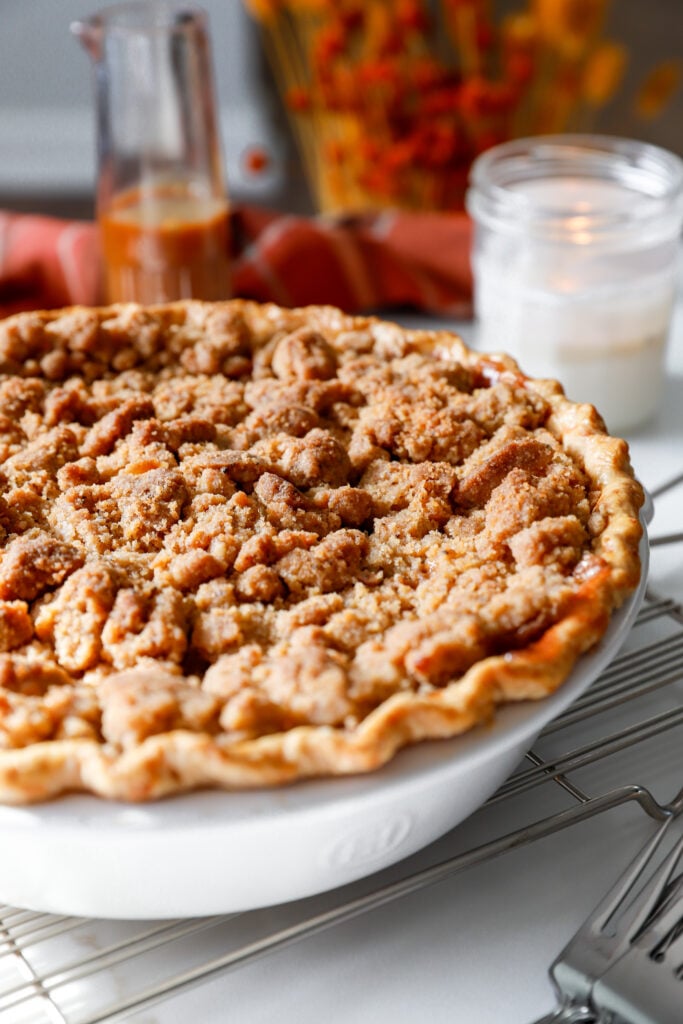
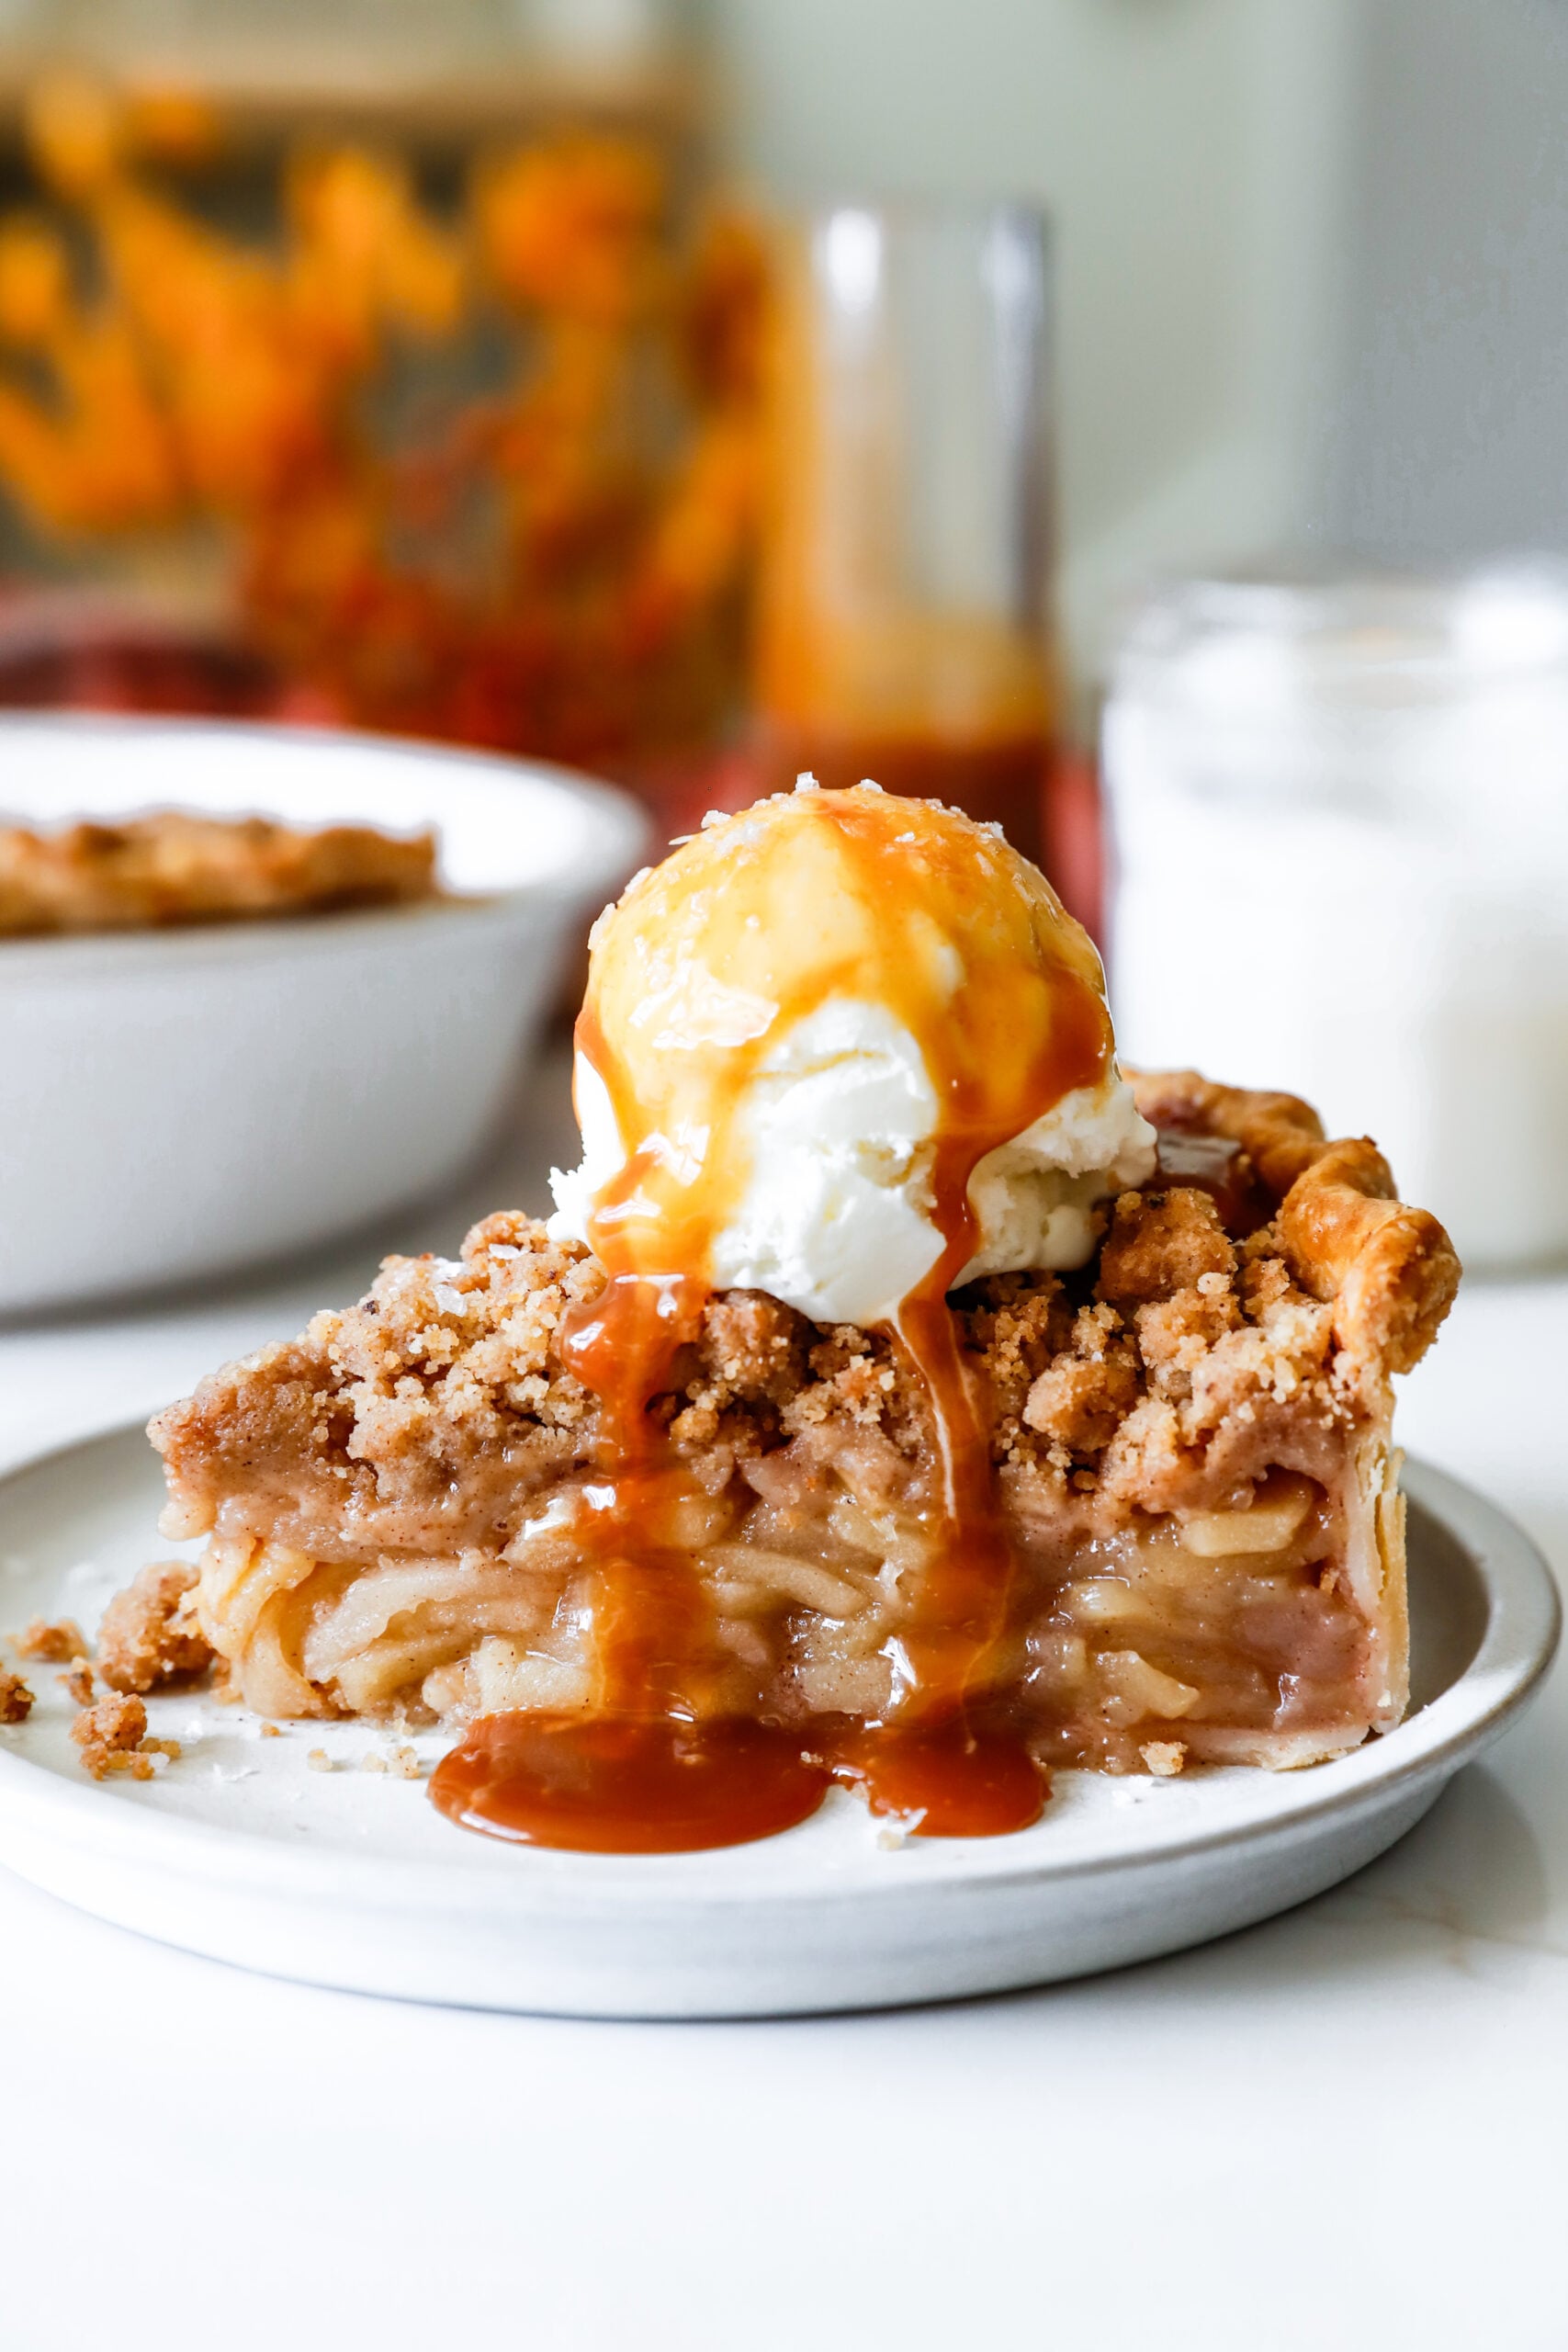
This Brown Butter Dutch Apple Pie is everything you could want in a homemade apple pie! Layers of tender, cinnamon spiced apples are tucked into a flaky pie crust and topped with the most delicious brown butter crumble. Serve it with a scoop of vanilla bean ice cream, a generous drizzle of homemade caramel sauce, and a sprinkle of flaky sea salt for a dessert everyone will be thanking you for making!
We’re starting with 4½ pounds of apples to give this pie its beautiful height and making the most fragrant, nutty brown butter that’s essential to the cozy flavor. And that homemade caramel sauce? It only takes two ingredients!
It’s a wonderful dessert for Thanksgiving, Christmas, or any occasion that calls for a little something special.
Why You’ll Love This Brown Butter Dutch Apple Pie
There’s something about the smell of apples, cinnamon, and butter baking in the oven that makes a house feel especially cozy.
And while I love a traditional apple pie, the brown butter crumble on this one is something special!
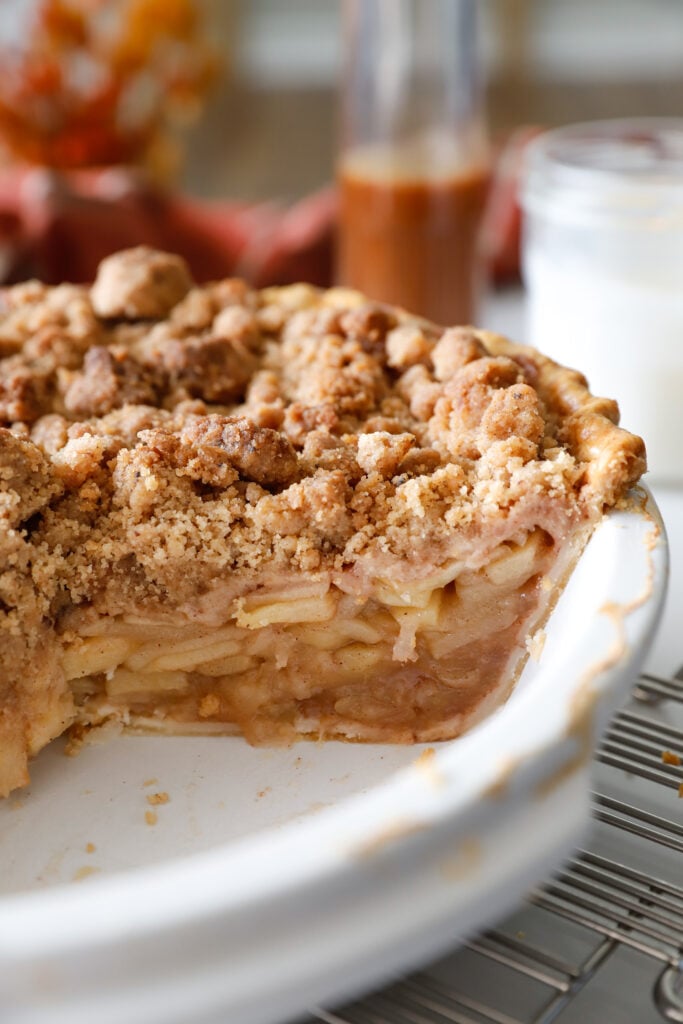
- A generous apple filling. We’re using 4½ pounds of whole apples, which gives us approximately 3 pounds once peeled, cored, and sliced. Every bite has beautiful layers of tender apples!
- The most delicious brown butter crumble. Browning the butter creates a rich, nutty flavor that takes a classic Dutch apple pie to another level.
- Two varieties of apples. Granny Smith and Honeycrisp apples give us the perfect balance of tartness, sweetness, and texture.
- Apples that hold their shape. Cooking the filling before baking helps prevent the apples from becoming mushy and gives us more control over their texture.
- An easy crust option. You can use refrigerated pie dough or make your own homemade pie crust.
- Homemade caramel sauce! My two ingredient caramel sauce adds the most incredible finishing touch, especially with vanilla bean ice cream and flaky sea salt.
- Perfect for making ahead. Bake the pie the day before serving so the filling has plenty of time to cool and set.
What Is Dutch Apple Pie?
Dutch apple pie is a variation of traditional apple pie made with a buttery crumb topping instead of a second layer of pie crust. The filling is typically made with sliced apples, sugar, and warm spices, while the crumble adds a sweet, slightly crisp texture.
For my version, we’re taking that classic crumble and making it with brown butter. As butter browns, the milk solids toast and develop a wonderfully fragrant, nutty flavor. Paired with cinnamon spiced apples, it’s absolutely delicious!
And because we’re using a crumble topping, there’s no need to roll out a second pie crust or make a lattice.
Ingredients You’ll Need for Brown Butter Dutch Apple Pie
This recipe uses familiar baking ingredients, but each one plays an important role in creating the perfect balance of flavor and texture.
For the Apple Filling
Granny Smith Apples: Their firm texture and tart flavor balance the sweetness of the filling and help the apple slices hold their shape during baking.
Honeycrisp Apples: Naturally sweet, juicy, and crisp, Honeycrisp apples complement the tart Granny Smith apples beautifully.
Light Brown Sugar: Adds sweetness with a subtle caramel like flavor.
Granulated Sugar: Sweetens the filling while allowing the natural apple flavor to shine.
Fresh Lemon Juice: Brightens the apples and balances the sweetness.
Ground Cinnamon: Gives the filling its classic warm, cozy apple pie flavor.
Salt: Balances the sweetness and enhances the flavor of the apples.
Cornstarch: Thickens the apple juices into a glossy sauce that helps the filling hold together when sliced.
Unsalted Butter: Adds richness to the apples as they cook.
Vanilla Extract: Rounds out the filling with a lovely warm flavor.
For the Brown Butter Crumble
Unsalted Butter: The star of the topping! Browning the butter creates a rich, nutty flavor that makes this crumble so delicious.
All Purpose Flour: Provides structure and helps create those beautiful crumble clusters.
Light Brown Sugar: Adds sweetness and a subtle caramel flavor.
Granulated Sugar: Helps create a lightly crisp texture.
Ground Cinnamon: Complements the cinnamon spiced apples.
Salt: Balances the sweetness and enhances the flavor of the brown butter.
For the Pie Crust
You can use one refrigerated pie crust, such as Pillsbury, or make my homemade All Butter Pie Dough.
I tested this pie using Pillsbury refrigerated pie dough, and it baked into a golden, flaky crust. Using a store bought crust also makes this recipe a little easier when you’re preparing several dishes for the holidays!
You’ll also need one egg and a tablespoon of water to make an egg wash for the exposed crust.
For the Homemade Caramel Sauce
Granulated Sugar: We’re caramelizing the sugar until it turns a beautiful golden brown, creating a deep, rich caramel flavor.
Heavy Whipping Cream: Transforms the caramelized sugar into a smooth, pourable sauce.
That’s it! Just two ingredients.
For Serving
Vanilla Bean Ice Cream: The creamy vanilla ice cream is absolutely delicious with the cinnamon spiced apples and warm caramel.
Flaky Sea Salt: A light sprinkle balances the sweetness of the caramel and enhances the rich, nutty flavor of the brown butter.
The Best Apples for Dutch Apple Pie
For this recipe, I love using a combination of Granny Smith and Honeycrisp apples.
Granny Smith apples bring a lovely tartness and firm texture, while Honeycrisp apples add natural sweetness and a wonderful crisp bite. Together, they create a beautifully balanced filling with tender apple slices that hold their shape.
Can You Use Cosmic Crisp Apples?
Absolutely! I also tested this recipe using Cosmic Crisp apples, and they were delicious!
Cosmic Crisp apples have a wonderful balance of sweetness and tartness, along with a firm, crisp texture that works beautifully in baked desserts. You can substitute Cosmic Crisp for the Honeycrisp apples, keeping the total prepared apple weight the same.
How Many Apples Do You Need?
This is one of the most important details in the entire recipe!
You’ll need:
- 2¼ pounds Granny Smith apples
- 2¼ pounds Honeycrisp apples
That’s 4½ pounds of whole apples, which yielded approximately 3 pounds (1,361 g) of peeled, cored, and sliced apples during my recipe testing.
I highly recommend weighing your apples after preparing them rather than relying on the number of apples. Their sizes can vary quite a bit!
My tip: Don’t reduce the apple quantity! That generous filling is essential for giving this pie its beautiful height and all those delicious layers of apples.
Equipment You’ll Need
For this recipe, I used my cream colored Emile Henry ceramic pie dish, and I love how beautifully it goes from the oven straight to the table!
The deeper sides accommodate the generous apple filling and brown butter crumble, while the pretty fluted edges make the finished pie look extra special.
You’ll also need:
- A large mixing bowl
- A sharp knife or apple peeler and corer
- A large, deep skillet or Dutch oven
- A light colored saucepan for browning the butter
- A pastry brush
- A pie crust shield or aluminum foil
- A rimmed baking sheet
- A wire cooling rack
- A heavy bottomed saucepan for the caramel sauce
My tip: Because this pie has a generous apple filling, use a deep pie dish with enough capacity to hold the apples and crumble without overflowing.
How to Make Brown Butter Dutch Apple Pie
Step 1: Prepare the Pie Crust
Allow your refrigerated pie crust to soften according to the package instructions so it unrolls without cracking.
Carefully transfer it to your pie dish, gently pressing the dough into the bottom and sides without stretching it.
Fold any excess dough underneath and crimp the edges as desired.
Refrigerate the prepared crust while you make the apple filling and crumble.
My tip: Keeping the pie crust chilled helps the fat remain firm until the pie goes into the oven, contributing to a flakier crust.
Step 2: Prepare the Apples
Peel, core, and slice the Granny Smith and Honeycrisp apples approximately 1/4 inch thick.
Place the prepared apples in a large mixing bowl with the brown sugar, granulated sugar, lemon juice, cinnamon, and salt.
Gently toss until the apples are evenly coated.
Allow them to sit for 30 minutes. During this time, the sugar draws moisture out of the apples, creating flavorful juices that we’ll use to make the filling.
Step 3: Cook the Apple Filling
Drain approximately 1/4 cup of the released juices into a small bowl and whisk with the cornstarch until smooth. Set aside.
Add the sliced apples and remaining reserved juices to a large, deep skillet or Dutch oven over medium heat.
Cook over medium heat for approximately 8–12 minutes, gently stirring occasionally, until the apples begin to soften but still hold their shape. Around the 8-minute mark, add the butter and stir until melted, coating the apples. Depending on the size of your skillet, the larger batch may need a few additional minutes.
The apples should look slightly translucent around the edges while remaining firm enough to finish cooking in the oven.
Stir the cornstarch mixture again, then gently fold it into the apples.
Continue cooking for another 1–2 minutes, until the juices thicken into a glossy sauce.
Remove from the heat, stir in the vanilla extract, and allow the filling to cool completely before assembling the pie.
My tip: Don’t cook the apples until they’re completely tender! We want them slightly softened but still holding their shape because they’ll finish cooking in the oven.
Step 4: Brown the Butter
Place the unsalted butter in a light colored saucepan over medium heat.
Allow the butter to melt, stirring frequently.
As it cooks, the butter will begin to foam and sizzle. Continue stirring and watch for the milk solids at the bottom of the pan to turn golden brown.
Once the butter develops a fragrant, nutty aroma, immediately remove it from the heat and pour it into a heatproof bowl.
Be sure to include all those little browned bits! They’re packed with flavor.
Allow the brown butter to cool until lukewarm before preparing the crumble.
My tip: Brown butter can go from perfectly golden to burnt very quickly. A light colored saucepan makes it much easier to see the color changing.
Step 5: Make the Brown Butter Crumble
In a mixing bowl, whisk together the flour, light brown sugar, granulated sugar, cinnamon, and salt.
Pour in the cooled brown butter and mix with a fork until combined.
Use your fingers to gently squeeze portions of the mixture together, creating a combination of small, medium, and large crumble clusters.
Refrigerate the crumble for 20–30 minutes before assembling the pie.
My tip: Don’t break the crumble into tiny, uniform pieces! Those larger clusters create the beautiful, rustic topping that makes Dutch apple pie so irresistible.
Step 6: Assemble the Pie
Preheat the oven to 400°F and position an oven rack in the lower third of the oven.
Remove the chilled pie crust from the refrigerator.
Spoon the completely cooled apple filling into the crust, arranging the apples evenly.
Scatter the chilled brown butter crumble over the filling, covering the apples with a generous layer of topping.
Gently press the crumble into place without compacting it.
Whisk together the egg and water, then lightly brush the exposed crimped edges of the crust.
Step 7: Bake Until Golden Brown
Place the pie on a parchment lined, rimmed baking sheet to catch any drips.
Bake at 400°F for 20 minutes.
Reduce the oven temperature to 350°F and continue baking for approximately 50 – 60 minutes, for a total baking time of about 70 – 80 minutes.
During recipe testing, the crust edges were already golden after the first 20 minutes. I added an aluminum foil pie crust shield at the 25-minute mark to prevent them from becoming too dark.
If the crumble begins browning too quickly, loosely tent the top with foil.
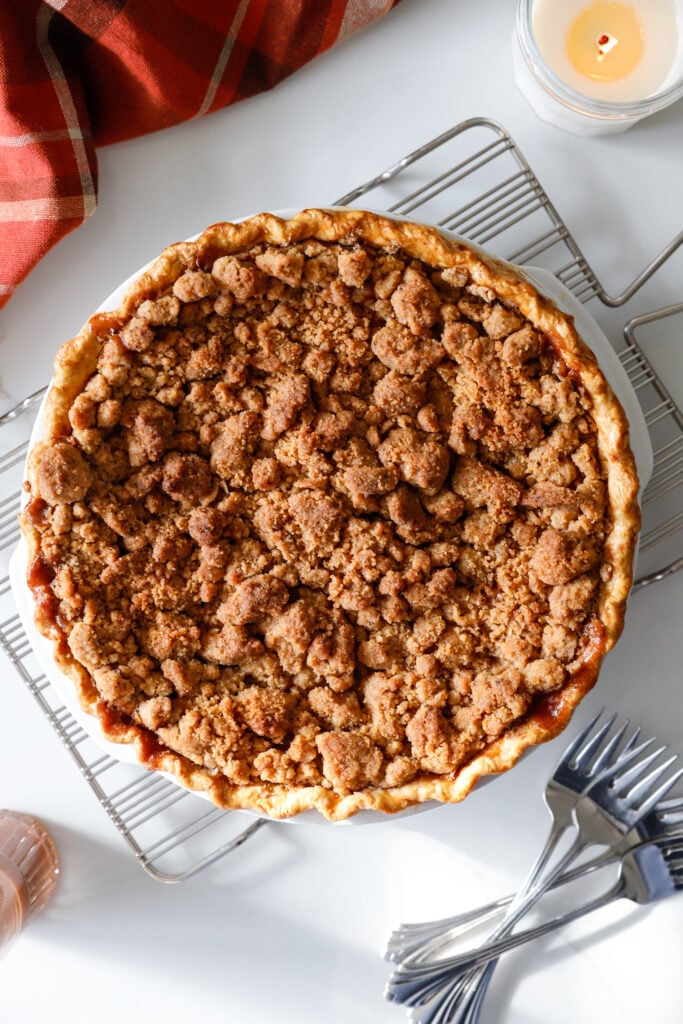
The pie is ready when the crumble is golden brown, the apples are tender, and the filling is bubbling through the topping, including near the center.
My tip: Don’t rely on the color of the crumble alone to determine whether the pie is finished. The filling needs to be heated through, and the bottom crust needs sufficient time to bake.
Step 8: Cool Completely Before Slicing
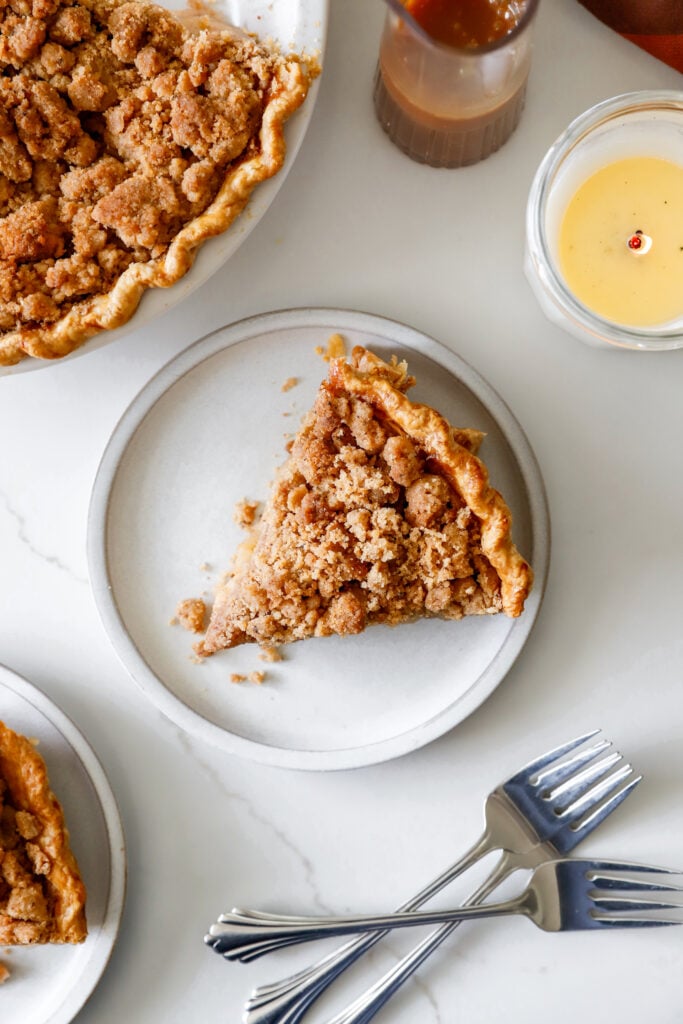
Transfer the baked pie to a wire cooling rack and allow it to cool completely for at least 4–6 hours before slicing.
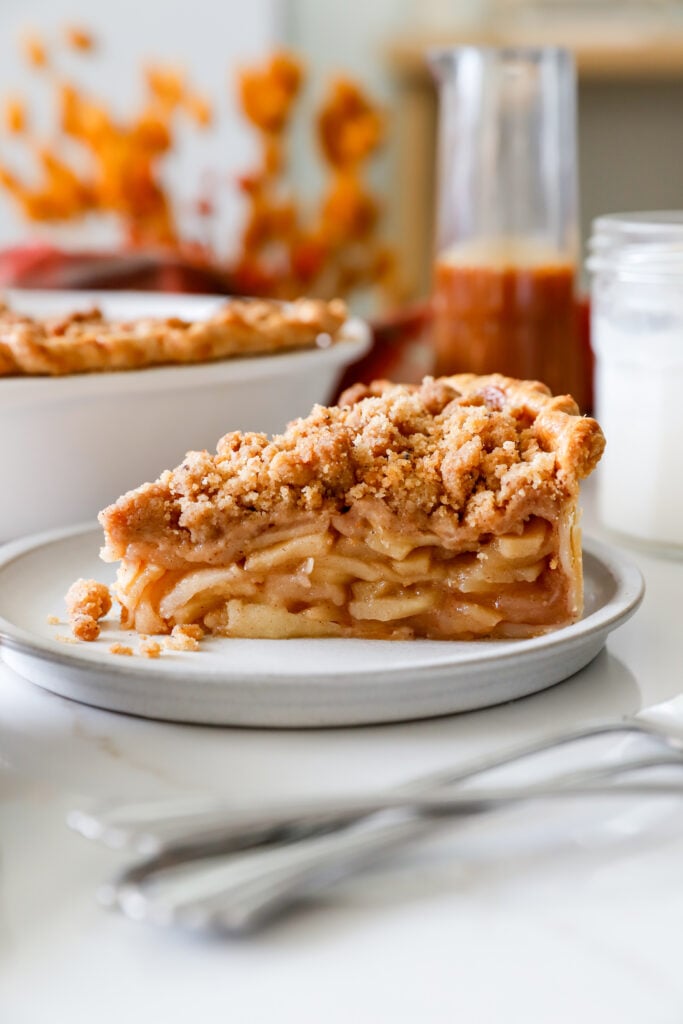
I know it’s tempting to cut into it right away, especially when the kitchen smells this good, but cooling is important! As the pie cools, the filling thickens and sets, making it much easier to cut beautiful slices without the apples spilling out.
And while the pie is cooling, it’s the perfect time to make our homemade caramel sauce!
Homemade Caramel Sauce (Just 2 Ingredients!)
Now for the finishing touch that makes this pie even more irresistible!
We’re serving it with vanilla bean ice cream, a generous drizzle of homemade caramel sauce, and a sprinkle of flaky sea salt.
And the best part? My caramel sauce only requires two ingredients!
I used to think I didn’t like caramel sauce until I started making my own. The rich flavor you get from caramelizing sugar until it turns a beautiful golden brown is completely different from what I expected. It’s incredibly delicious, and I could honestly drizzle it on just about everything!
This sauce uses the dry caramel method, which means we’re melting the sugar directly in the saucepan without adding water.
Ingredients
1 cup granulated sugar
1 scant cup heavy whipping cream
Step 1: Caramelize the Sugar
Add the granulated sugar to a heavy bottomed saucepan over medium heat.
Allow the sugar to begin melting. Once you notice it starting to melt, stir continuously until all the sugar has dissolved and the caramel turns a beautiful golden brown.
Watch carefully! Sugar can go from perfectly caramelized to burnt very quickly.
Step 2: Slowly Add the Heavy Cream
Remove the saucepan from the heat.
Very carefully add the heavy whipping cream, approximately 1 tablespoon at a time, stirring until completely incorporated before adding the next tablespoon.
The caramel will bubble and steam vigorously as you add the cream, so pour slowly and be extra careful to avoid burns!
Important: Hot caramel can cause serious burns. Use a deep, heavy bottomed saucepan, keep your hands away from the steam, and add the cream slowly.
If the caramel begins to harden or form clumps when the cream is added, don’t panic. Gently warming the mixture again while stirring can help dissolve them.
Step 3: Finish the Caramel Sauce
Once all the heavy cream has been incorporated, return the saucepan to the burner over medium heat.
Cook for approximately 30 seconds, stirring continuously.
Remove from the heat and strain through a fine mesh strainer for an extra smooth consistency.
Allow the caramel to cool slightly before serving. The sauce will thicken as it cools.
Step 4: Serve with Apple Pie
Place a slice of Brown Butter Dutch Apple Pie on a dessert plate.
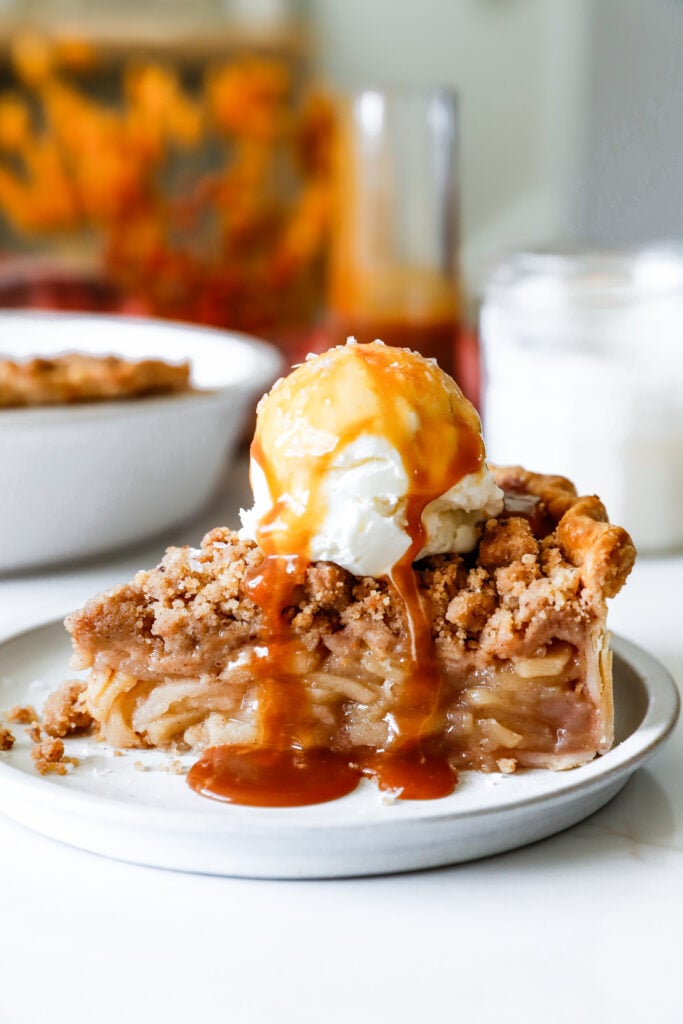
Top with a generous scoop of vanilla bean ice cream and drizzle the homemade caramel sauce over the top, allowing it to cascade down those beautiful layers of apples.
Finish with a light sprinkle of flaky sea salt (I love Maldon!) to balance the sweetness and bring out the rich caramel flavor.
The combination of sweet caramel, tender cinnamon spiced apples, nutty brown butter crumble, creamy ice cream, and just a hint of salt is absolutely delicious!
My Best Tips for Perfect Brown Butter Dutch Apple Pie
After testing this recipe, these are the details I found most important.
1. Weigh Your Prepared Apples
Using the correct amount of apples makes a big difference in the finished pie.
Start with approximately 4½ pounds of whole apples, but aim for 3 pounds after peeling, coring, and slicing.
This gives the pie its generous filling and beautiful layers.
2. Slice the Apples Evenly
Aim for slices approximately 1/4 inch thick.
Consistent slices cook more evenly, so you don’t end up with some apples that are mushy while others are still too firm.
3. Don’t Skip Cooking the Apples First
Precooking the apples helps release some of their moisture and allows you to thicken the juices before they go into the crust.
It also helps the apples settle before baking rather than shrinking dramatically inside the pie.
Just remember to leave them slightly firm!
4. Let the Filling Cool Before Assembling
Adding hot apple filling to an unbaked pie crust can soften the fat in the dough before it reaches the oven.
Allow the filling to cool completely before spooning it into your chilled crust.
5. Watch Your Brown Butter Carefully
Brown butter is what makes this crumble special!
Remove it from the heat as soon as the milk solids turn golden brown and the butter smells nutty. Immediately transfer it to another bowl to stop the cooking process.
6. Make Generous Crumble Clusters
I love a combination of smaller crumbs and larger clusters.
The smaller pieces fill in the gaps, while the larger pieces create that beautiful bakery style crumble topping.
7. Protect the Pie Crust Edges
The crimped edges may brown before the filling is fully cooked.
A pie crust shield or strips of aluminum foil will help protect them while the pie continues baking.
8. Allow Plenty of Cooling Time
For clean slices, allow the pie to cool completely.
The filling may look a little loose while it’s hot, but it will thicken as it cools.
How to Keep the Bottom Pie Crust from Getting Soggy
Fruit pies contain a lot of moisture, so the bottom crust can sometimes be softer than the exposed edges.
Here are a few things that can help:
Use a chilled pie crust. Keep the prepared crust refrigerated until you’re ready to assemble.
Cool the filling completely. Don’t add hot apples to an unbaked crust.
Bake in the lower third of the oven. This helps expose the bottom of the pie dish to more heat.
Bake until the filling is bubbling. A golden crumble doesn’t necessarily mean the bottom crust has finished baking.
Allow the pie to cool completely. The filling continues to set as it cools, making the pie easier to slice.
During my recipe testing, the bottom crust was slightly softer than the golden edges, which can happen with a generously filled fruit pie baked in a ceramic dish.
Can You Make Dutch Apple Pie Ahead of Time?
Absolutely! In fact, I love making this pie the day before serving because it gives the filling plenty of time to cool and set.
Make the Apple Filling Ahead
Prepare the filling as directed, allow it to cool, and refrigerate it in an airtight container for up to 2 days.
Make the Brown Butter Crumble Ahead
Prepare the crumble and store it in an airtight container in the refrigerator for up to 2 days.
If it becomes too firm, gently break it into clusters before adding it to the pie.
Make the Entire Pie Ahead
Bake the pie the day before you plan to serve it.
Allow it to cool completely, then loosely cover it and store it at room temperature overnight in a cool kitchen.
Make the Caramel Sauce Ahead
The homemade caramel sauce can also be prepared ahead of time.
Allow it to cool, then transfer it to an airtight container and refrigerate for up to one week.
When you’re ready to serve, remove the caramel sauce from the refrigerator about 15 minutes beforehand to let it come to room temperature slightly, then drizzle over your apple pie!
How to Store Brown Butter Dutch Apple Pie
Room Temperature: Once completely cooled, loosely cover the pie and store at room temperature for up to 2 days.
Refrigerator: For longer storage, cover and refrigerate for up to 4 days.
Freezer: Wrap completely cooled individual slices tightly and freeze for up to 3 months. Thaw in the refrigerator before reheating.
How to Reheat Dutch Apple Pie
To warm an individual slice, place it in a 325°F oven for approximately 10–15 minutes, or until heated through.
For a larger portion, loosely cover with foil and warm at 325°F until heated through.
Reheating in the oven helps preserve more of the crumble’s texture than microwaving.
FAQs
What is the difference between Dutch apple pie and regular apple pie?
Traditional apple pie typically has a top crust made from pastry dough, while Dutch apple pie has a buttery crumb or streusel topping. Both have a spiced apple filling, but Dutch apple pie offers an additional sweet, crumbly texture.
Do I have to brown the butter?
You can make a crumble topping with regular melted butter, but I highly recommend browning it for this recipe. The toasted, nutty flavor is what makes this brown butter crumble so delicious and distinctive.
Why do you cook the apples before baking?
Precooking the apples helps release moisture, gives you more control over their texture, and allows the filling to thicken before baking. It also helps reduce the amount the filling settles as the pie bakes.
How do I know when Dutch apple pie is done?
The most important sign that your pie is ready is thick apple filling bubbling up through the crumble topping, especially near the center. Don’t rely on the color of the crumble alone, as it may turn golden brown before the filling is fully cooked. For extra reassurance, use an instant read thermometer to check that the filling near the center has reached approximately 200–205°F.
Can I use only Granny Smith apples?
Yes, although the filling will be more tart.
Can I freeze Dutch apple pie?
Yes! Once baked and completely cooled, wrap the pie or individual slices tightly and freeze for up to 3 months. Thaw in the refrigerator and reheat in the oven before serving.
What to Serve with Brown Butter Dutch Apple Pie
My favorite way to serve this pie is with vanilla bean ice cream, homemade caramel sauce, and flaky sea salt.
The cold, creamy ice cream melting over the warm cinnamon-spiced apples, the rich caramel cascading down the sides, and that little sprinkle of salt make such a delicious combination!
It’s the perfect ending to Thanksgiving dinner, a cozy fall gathering, or any occasion that calls for a homemade dessert.
And if you’re planning your holiday menu, be sure to check out a few more of my Thanksgiving favorites!
- Brown Sugar Glazed Ham
- Creamy Mashed Potatoes
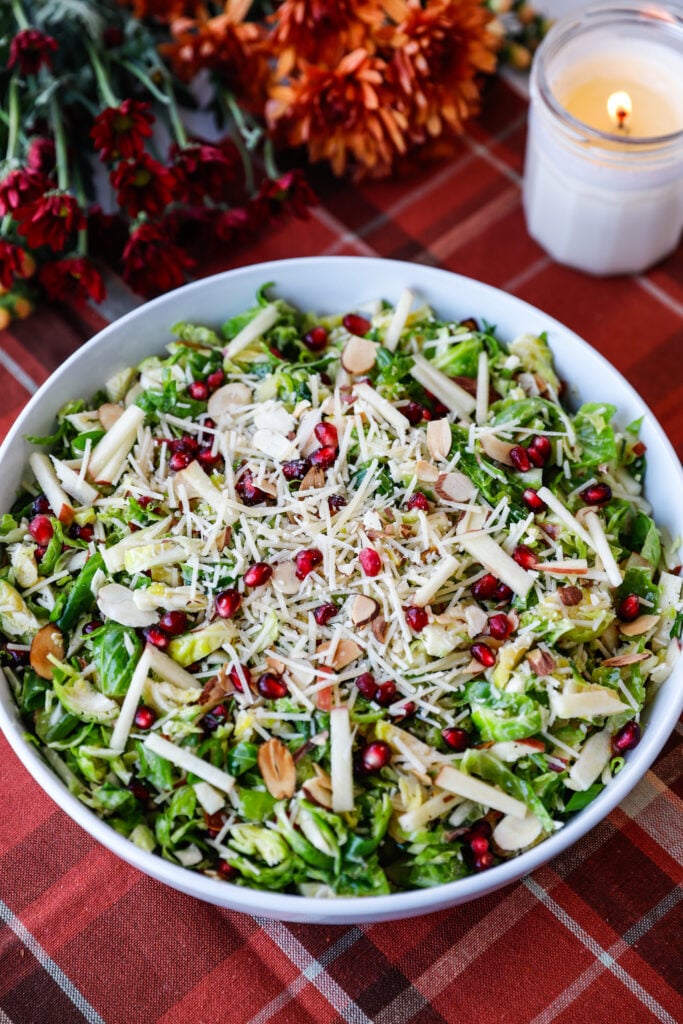
- Autumn Brussels Sprouts Slaw
- Garlic Parmesan Stuffed Mushrooms
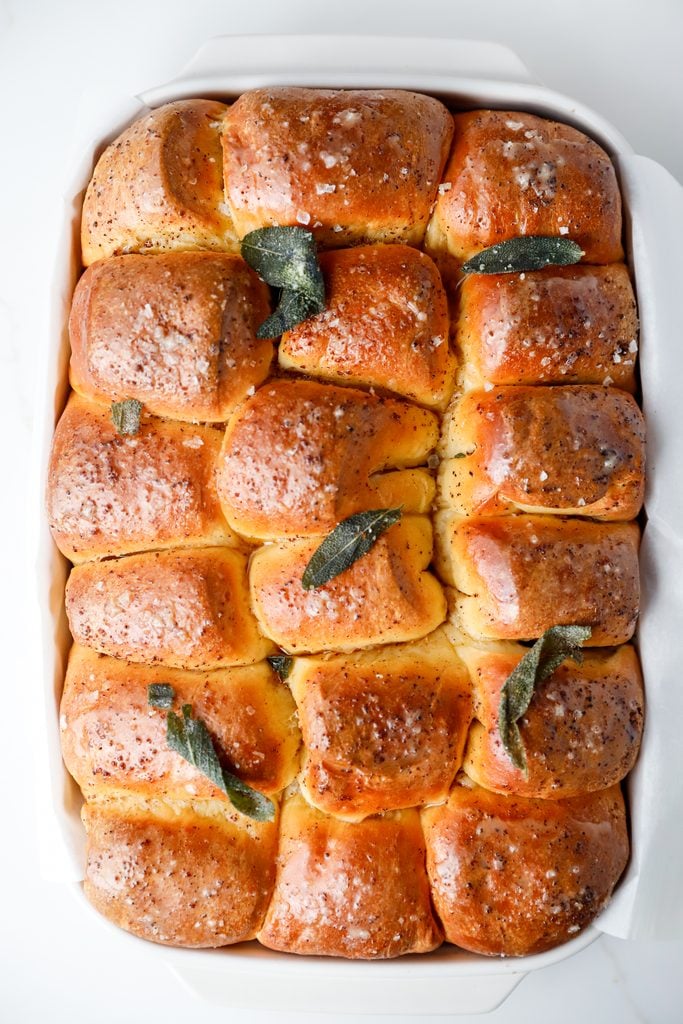
- Parker House Rolls with Sage Brown Butter
Brown Butter Dutch Apple Pie
Ingredients
Pie Crust
- 1 refrigerated pie crust such as Pillsbury, or 1 homemade pie crust
- 1 large egg
- 1 tablespoon water
Apple Filling
- 2 1/4 pounds Granny Smith apples whole weight
- 2 1/4 pounds Honeycrisp apples whole weight
- 1/3 cup packed light brown sugar
- 1/4 cup granulated sugar
- 1 1/2 tablespoons fresh lemon juice
- 1 1/2 teaspoons ground cinnamon
- 1/4 teaspoon salt
- 2 1/2 tablespoons cornstarch
- 2 tablespoons unsalted butter
- 2 teaspoons vanilla extract
Brown Butter Crumble
- 3/4 cup 170 g unsalted butter
- 1 1/2 cups 180 g all purpose flour
- 3/4 cup packed light brown sugar
- 1/4 cup granulated sugar
- 1 teaspoon ground cinnamon
- 1/2 teaspoon salt
- Up to 1 tablespoon water if needed
Optional Homemade Caramel Sauce
- 1 cup granulated sugar
- 1 scant cup heavy whipping cream
For Serving
- Vanilla bean ice cream
- Flaky sea salt
Method
Prepare the Pie Crust
- Allow the refrigerated pie crust to soften according to package instructions. Transfer to a deep pie dish, gently pressing into the bottom and sides without stretching. Fold excess dough underneath and crimp the edges.
- Refrigerate the prepared crust while making the filling and crumble.
Prepare the Apple Filling
- Peel, core, and slice the apples approximately 1/4 inch thick. You should have about 3 pounds (1,361 g) of prepared apples.
- In a large bowl, toss the apples with brown sugar, granulated sugar, lemon juice, cinnamon, and salt. Let sit for 30 minutes.
- Drain approximately 1/4 cup of the released juices into a small bowl and whisk with the cornstarch until smooth.
- Add the apples and remaining reserved juices to a large, deep skillet over medium heat. Cook for 8–12 minutes, gently stirring occasionally, until the apples begin to soften but still hold their shape. Around the 8-minute mark, add the butter and stir until melted.
- Stir the cornstarch mixture again and add it to the skillet. Cook for 1–2 minutes, until the juices thicken and become glossy.
- Remove from the heat, stir in the vanilla extract, and allow the filling to cool completely.
Prepare the Brown Butter Crumble
- Melt the butter in a light colored saucepan over medium heat, stirring frequently. Continue cooking until the milk solids turn golden brown and the butter smells nutty.
- Immediately transfer the brown butter, including the browned bits, to a heatproof bowl. Cool until lukewarm.
- In a mixing bowl, whisk together the flour, brown sugar, granulated sugar, cinnamon, and salt.
- Add the brown butter and mix with a fork until combined. Use your fingers to create small and large crumble clusters.
- Refrigerate the crumble for 20–30 minutes.
Assemble and Bake
- Preheat the oven to 400°F with a rack in the lower third of the oven.
- Spoon the completely cooled apple filling into the chilled pie crust.
- Distribute the chilled brown butter crumble evenly over the filling.
- Whisk the egg with 1 tablespoon of water and lightly brush the exposed crust edges.
- Place the pie on a parchment lined, rimmed baking sheet. Bake at 400°F for 20 minutes.
- Reduce the oven temperature to 350°F and continue baking for approximately 50 – 60 minutes, or until the filling is bubbling near the center and the apples are tender. Protect the crust edges with a pie shield or aluminum foil as needed. During testing, a crust shield was added at 25 minutes total baking time.
- Remove from the oven and cool completely on a wire rack for at least 4–6 hours before slicing.
Make the Homemade Caramel Sauce (Optional)
- Add the granulated sugar to a heavy bottomed saucepan over medium heat. Once the sugar begins melting, stir continuously until completely melted and golden brown.
- Remove from the heat. Very carefully add the heavy whipping cream, approximately 1 tablespoon at a time, stirring until incorporated before adding the next tablespoon. The caramel will bubble and steam vigorously, so use caution.
- Return the saucepan to medium heat and cook for approximately 30 seconds, stirring continuously.
- Remove from the heat and strain through a fine mesh strainer. Allow to cool slightly before serving.
Serve
- Top each slice of Dutch apple pie with vanilla bean ice cream and a generous drizzle of homemade caramel sauce. Finish with a sprinkle of flaky sea salt.
Notes
A Little Something Sweet
There’s just something special about bringing a homemade apple pie to the table.
From the smell of cinnamon and brown butter filling the kitchen to that first slice topped with melting vanilla ice cream and homemade caramel sauce, it’s one of those desserts that makes everyone want to linger around the table a little longer.
I hope this Brown Butter Dutch Apple Pie becomes a favorite at your holiday gatherings, too!
If you make this recipe, I’d love to hear what you think! Leave a comment and a star rating below, and don’t forget to tag me on Instagram @megsescapades so I can see your beautiful pies!
Happy baking! 🧡




What did you think?