Meg's Escapades
  • Recipes
  • About
  • Contact
  • Shop

I’m looking for

  • All Recipes
  • Appetizers
  • Salads
  • Breakfast + Brunch
  • Dessert
  • Breakfast
  • Dinner
  • Grilling
  • Bread
  • Side Dishes
  • Soups + Stews

Popular recipes

Creamy Mashed Potatoes

Aguacates Rellenos De Camarones / Avocados Stuffed with Shrimp

Chocolate Chip Banana Muffins with Streusel Topping

Guava Peach Bellini

Recipes
  • All Recipes
  • Appetizers
  • Salads
  • Breakfast
  • Dessert
  • Dinner
  • Grilling
  • Side Dishes

Popular Recipes

Creamy Mashed Potatoes

Creamy Mashed Potatoes

Aguacates Rellenos De Camarones / Avocados Stuffed with Shrimp

Aguacates Rellenos De Camarones / Avocados Stuffed with Shrimp

Chocolate Chip Banana Muffins with Streusel Topping

Chocolate Chip Banana Muffins with Streusel Topping

Guava Peach Bellini

Guava Peach Bellini

About
Contact
Shop
RecipesAppetizers

Homemade Pork Dumplings (Potstickers) with Napa Cabbage

By Meaghan SmithJanuary 13, 2023
Prep Time 30 minutes mins
Cook Time 10 minutes mins
Servings 42

These homemade pork dumplings are filled with napa cabbage, ginger, garlic, and sesame flavor, then pan fried and steamed until perfectly crispy and juicy.

Jump to Recipe
Jump to Video
  • Facebook
  • Email
  • Print

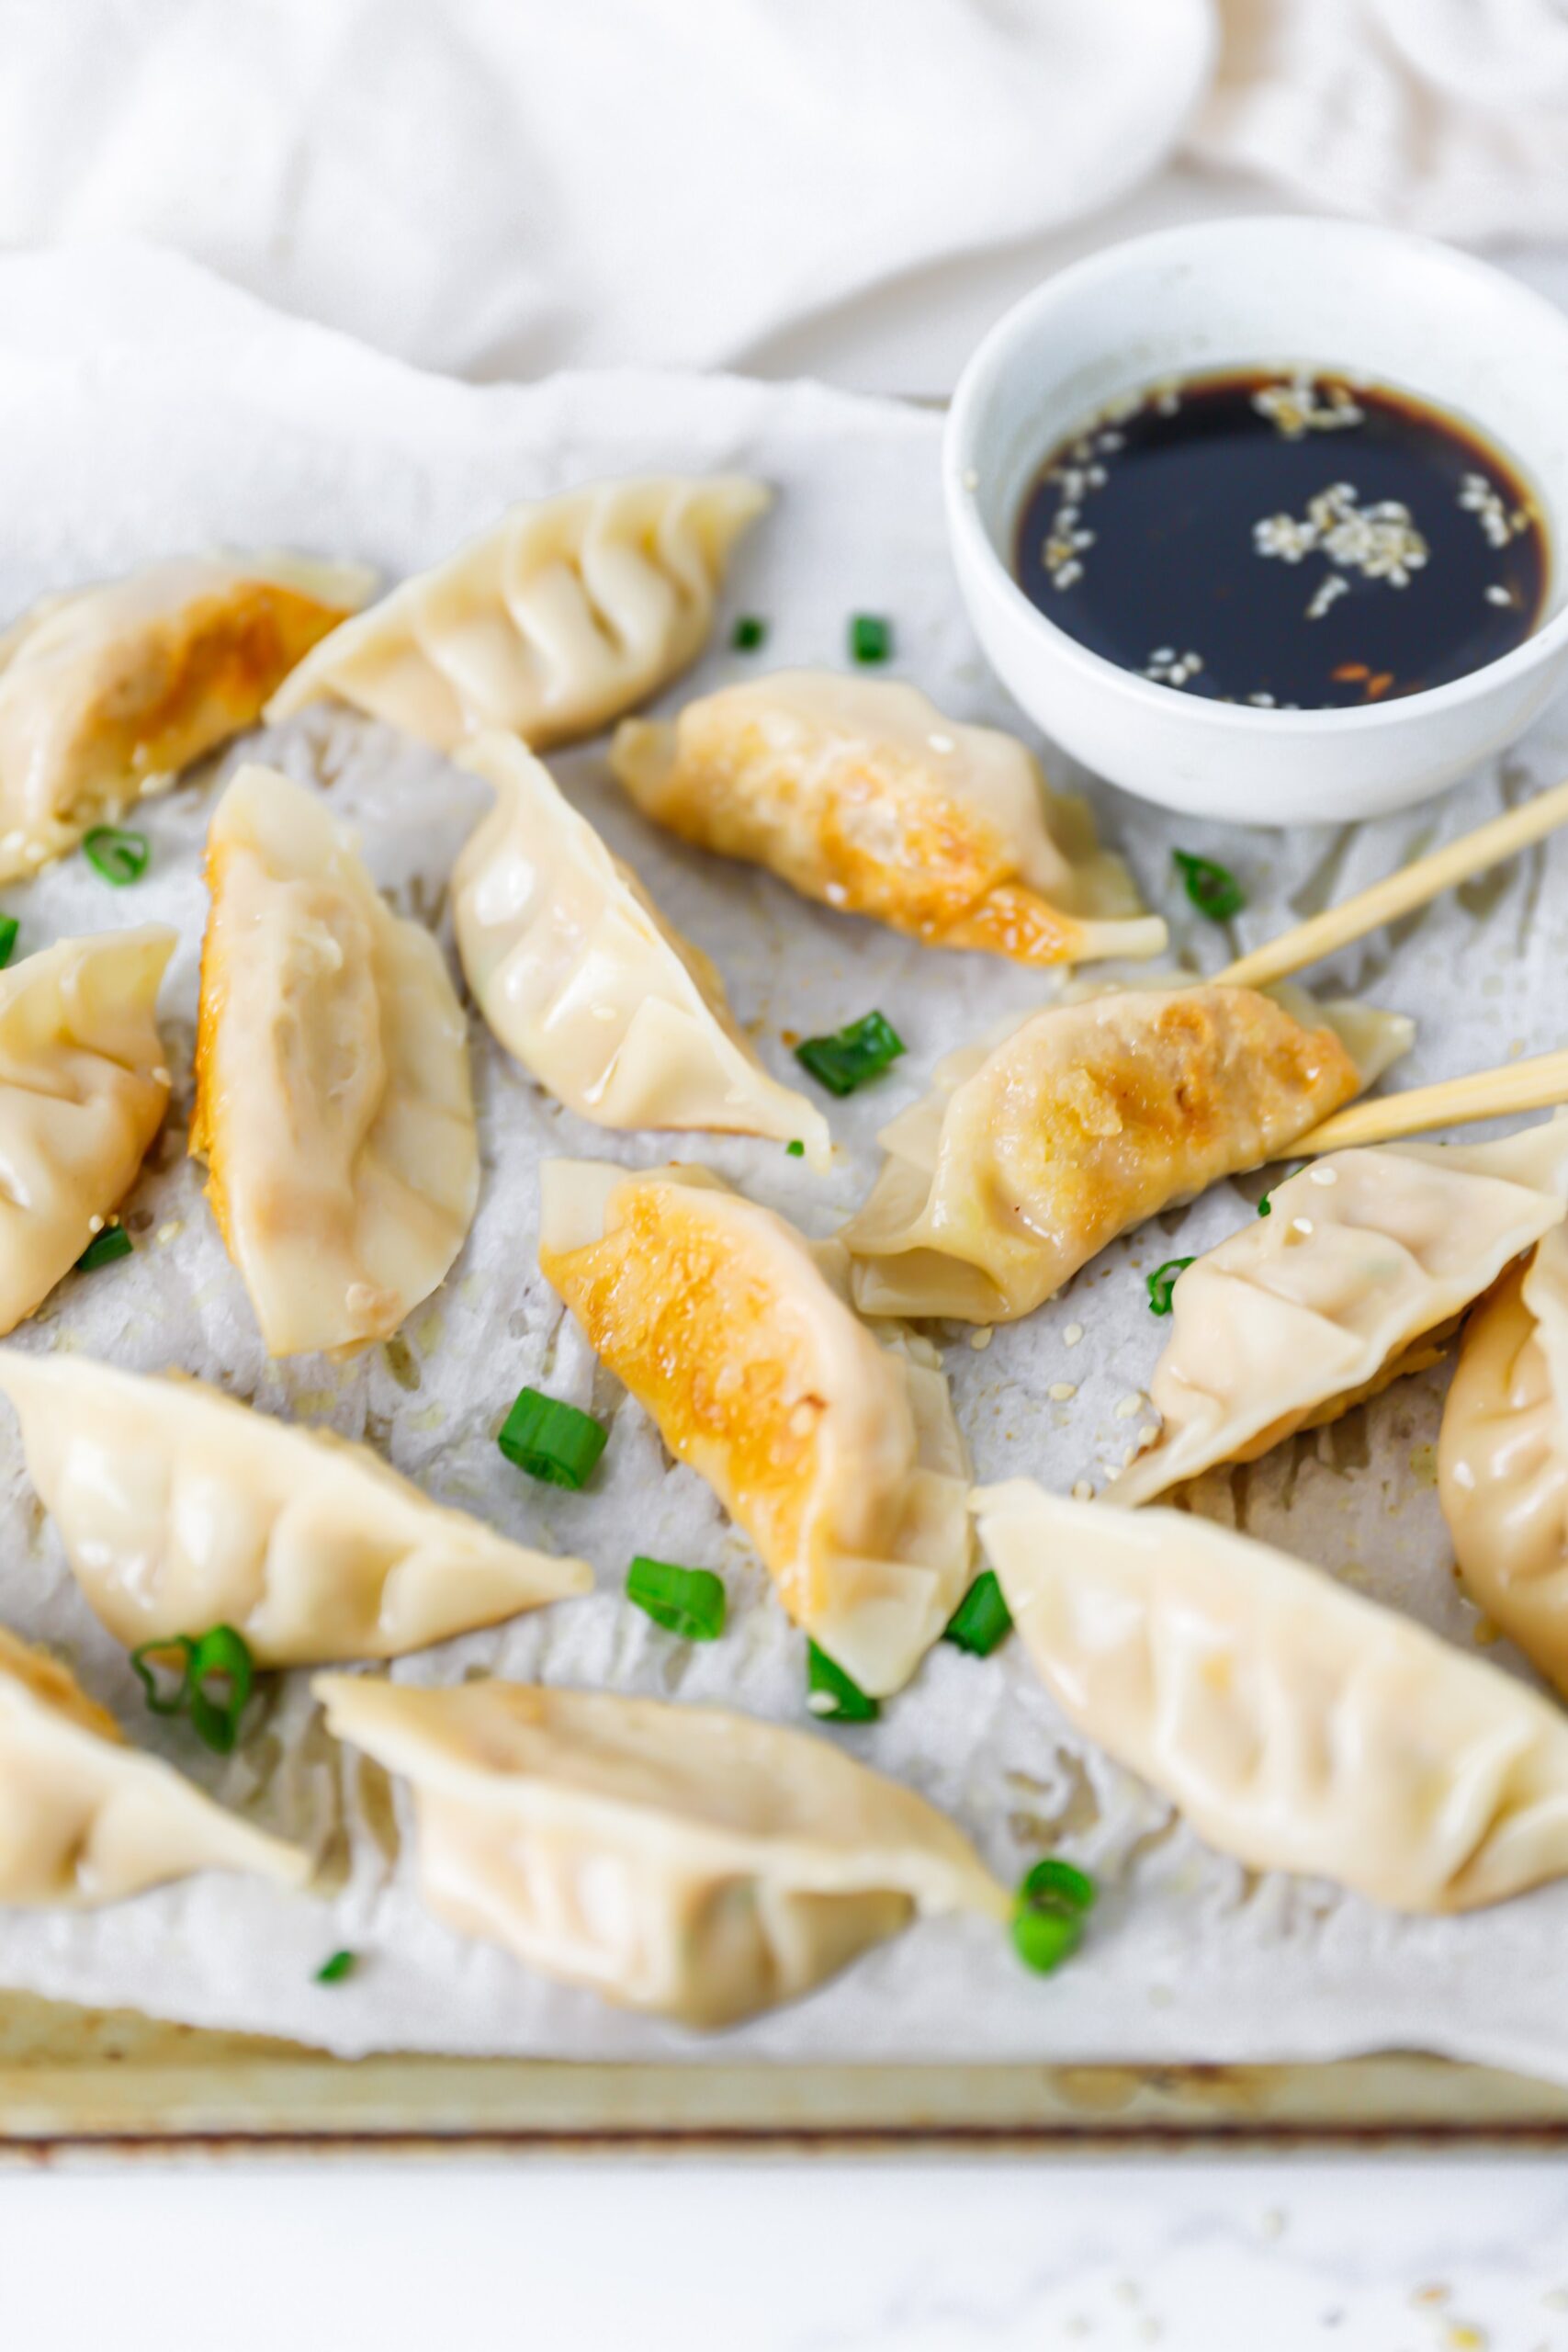
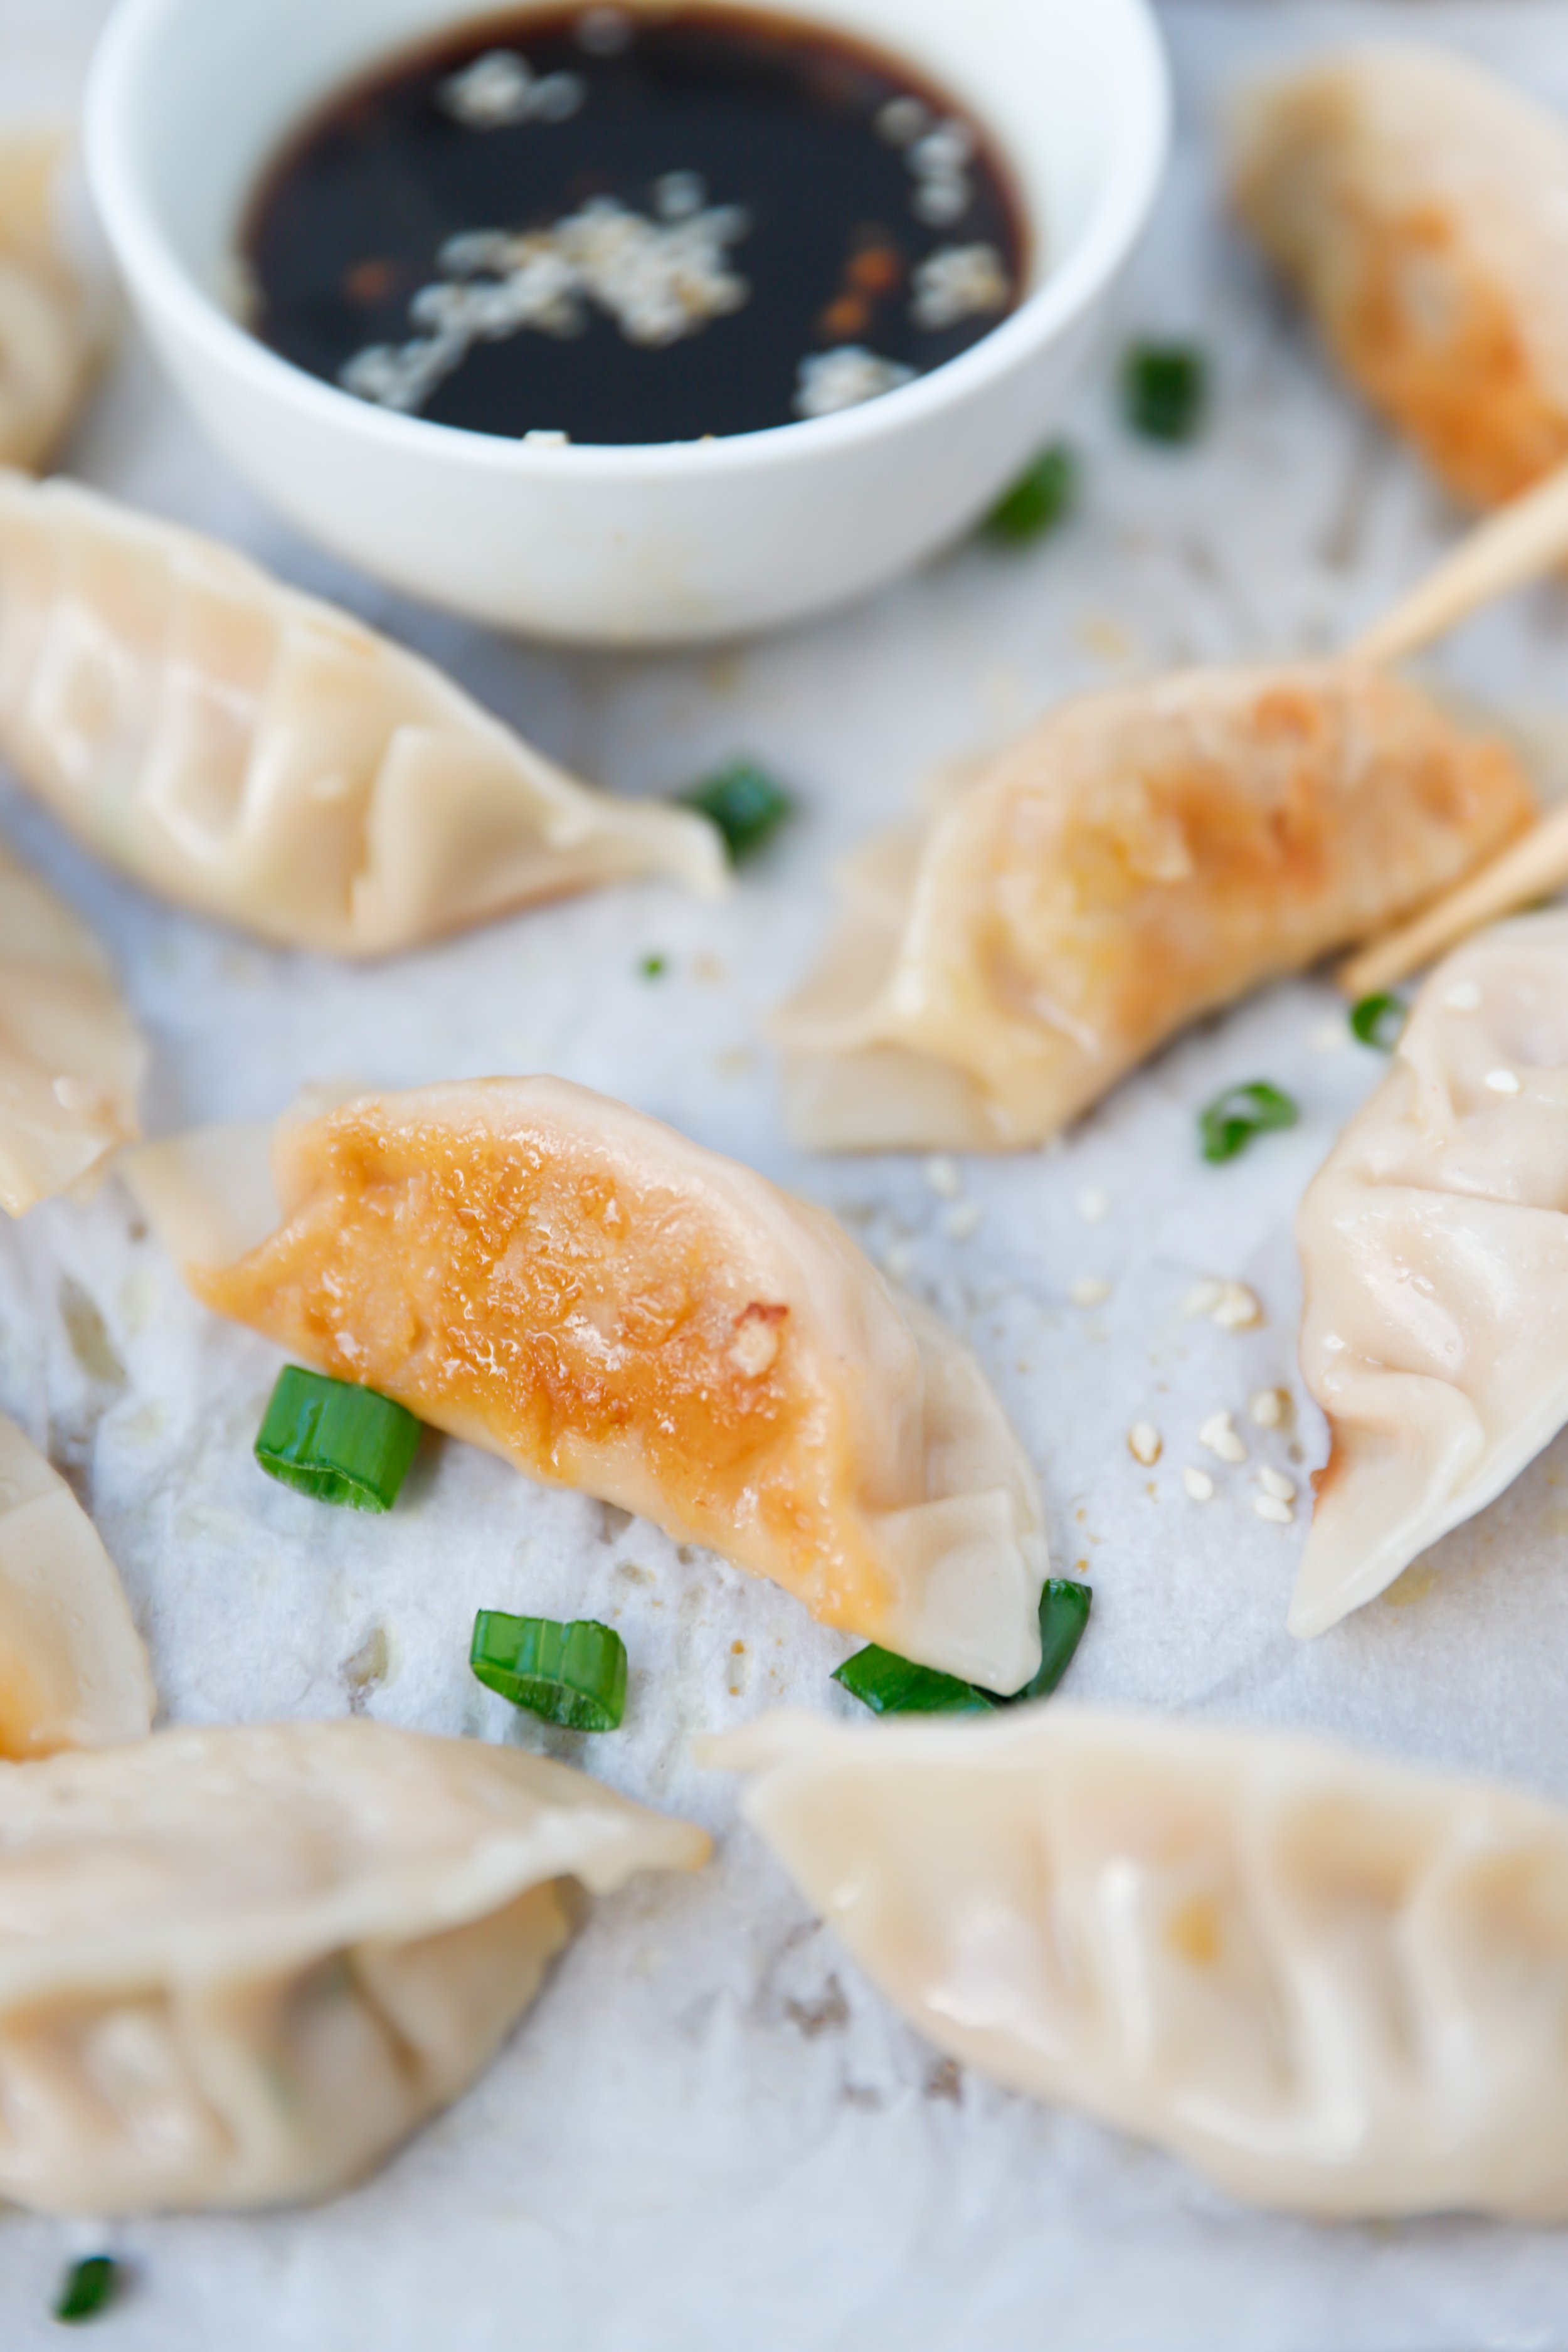
Dumplings are one of those foods that instantly feel like comfort. Warm, savory, crispy on the bottom, and juicy inside, they are basically the perfect bite. These homemade Pork Dumplings are filled with a flavorful mix of ground pork, napa cabbage, garlic, ginger, green onion, soy sauce, and sesame oil, then cooked potsticker style so they get golden and crisp on the bottom while staying tender and steamy on top.

Growing up, dumplings were always one of my favorite foods, and honestly, they still are. There is never a wrong time to eat them. After school snack? Dumplings. Late night craving? Dumplings. A weekend cooking project that pays off all month? Dumplings. Hosting family and need an easy appetizer that everyone will fight over? Dumplings.

The best part is you can make a big batch and freeze them, so you always have homemade dumplings ready anytime the craving hits.

Homemade pork dumplings filled with napa cabbage, ginger, and garlic on parchment paper

Why You’ll Love These Homemade Pork Dumplings

If you love crispy, golden bottoms with a juicy filling inside, these dumplings are about to become your new favorite.

  • The filling is flavorful, savory, and perfectly balanced
  • They cook up crispy on the bottom and tender on top
  • They freeze beautifully for quick meals later
  • They are fun to make and even more fun to eat
  • Perfect for parties, family dinners, and late night cravings

Honestly, there is never a wrong time for dumplings.

Uncooked pork dumplings folded with pleats and ready to cook

When to Make These Homemade Pork Dumplings

These homemade pork dumplings are perfect for:

  • Lunar New Year celebrations
  • Meal prep Sundays
  • Family dinner nights
  • Appetizers for guests
  • Game day snacks
  • Late night cravings
  • Freezer stocking for busy weeks

If you want a recipe that feels special but is still practical, this is it.

Pan fried pork dumplings served with soy sauce and black vinegar dipping sauce

How to Freeze Dumplings

To freeze dumplings for later:

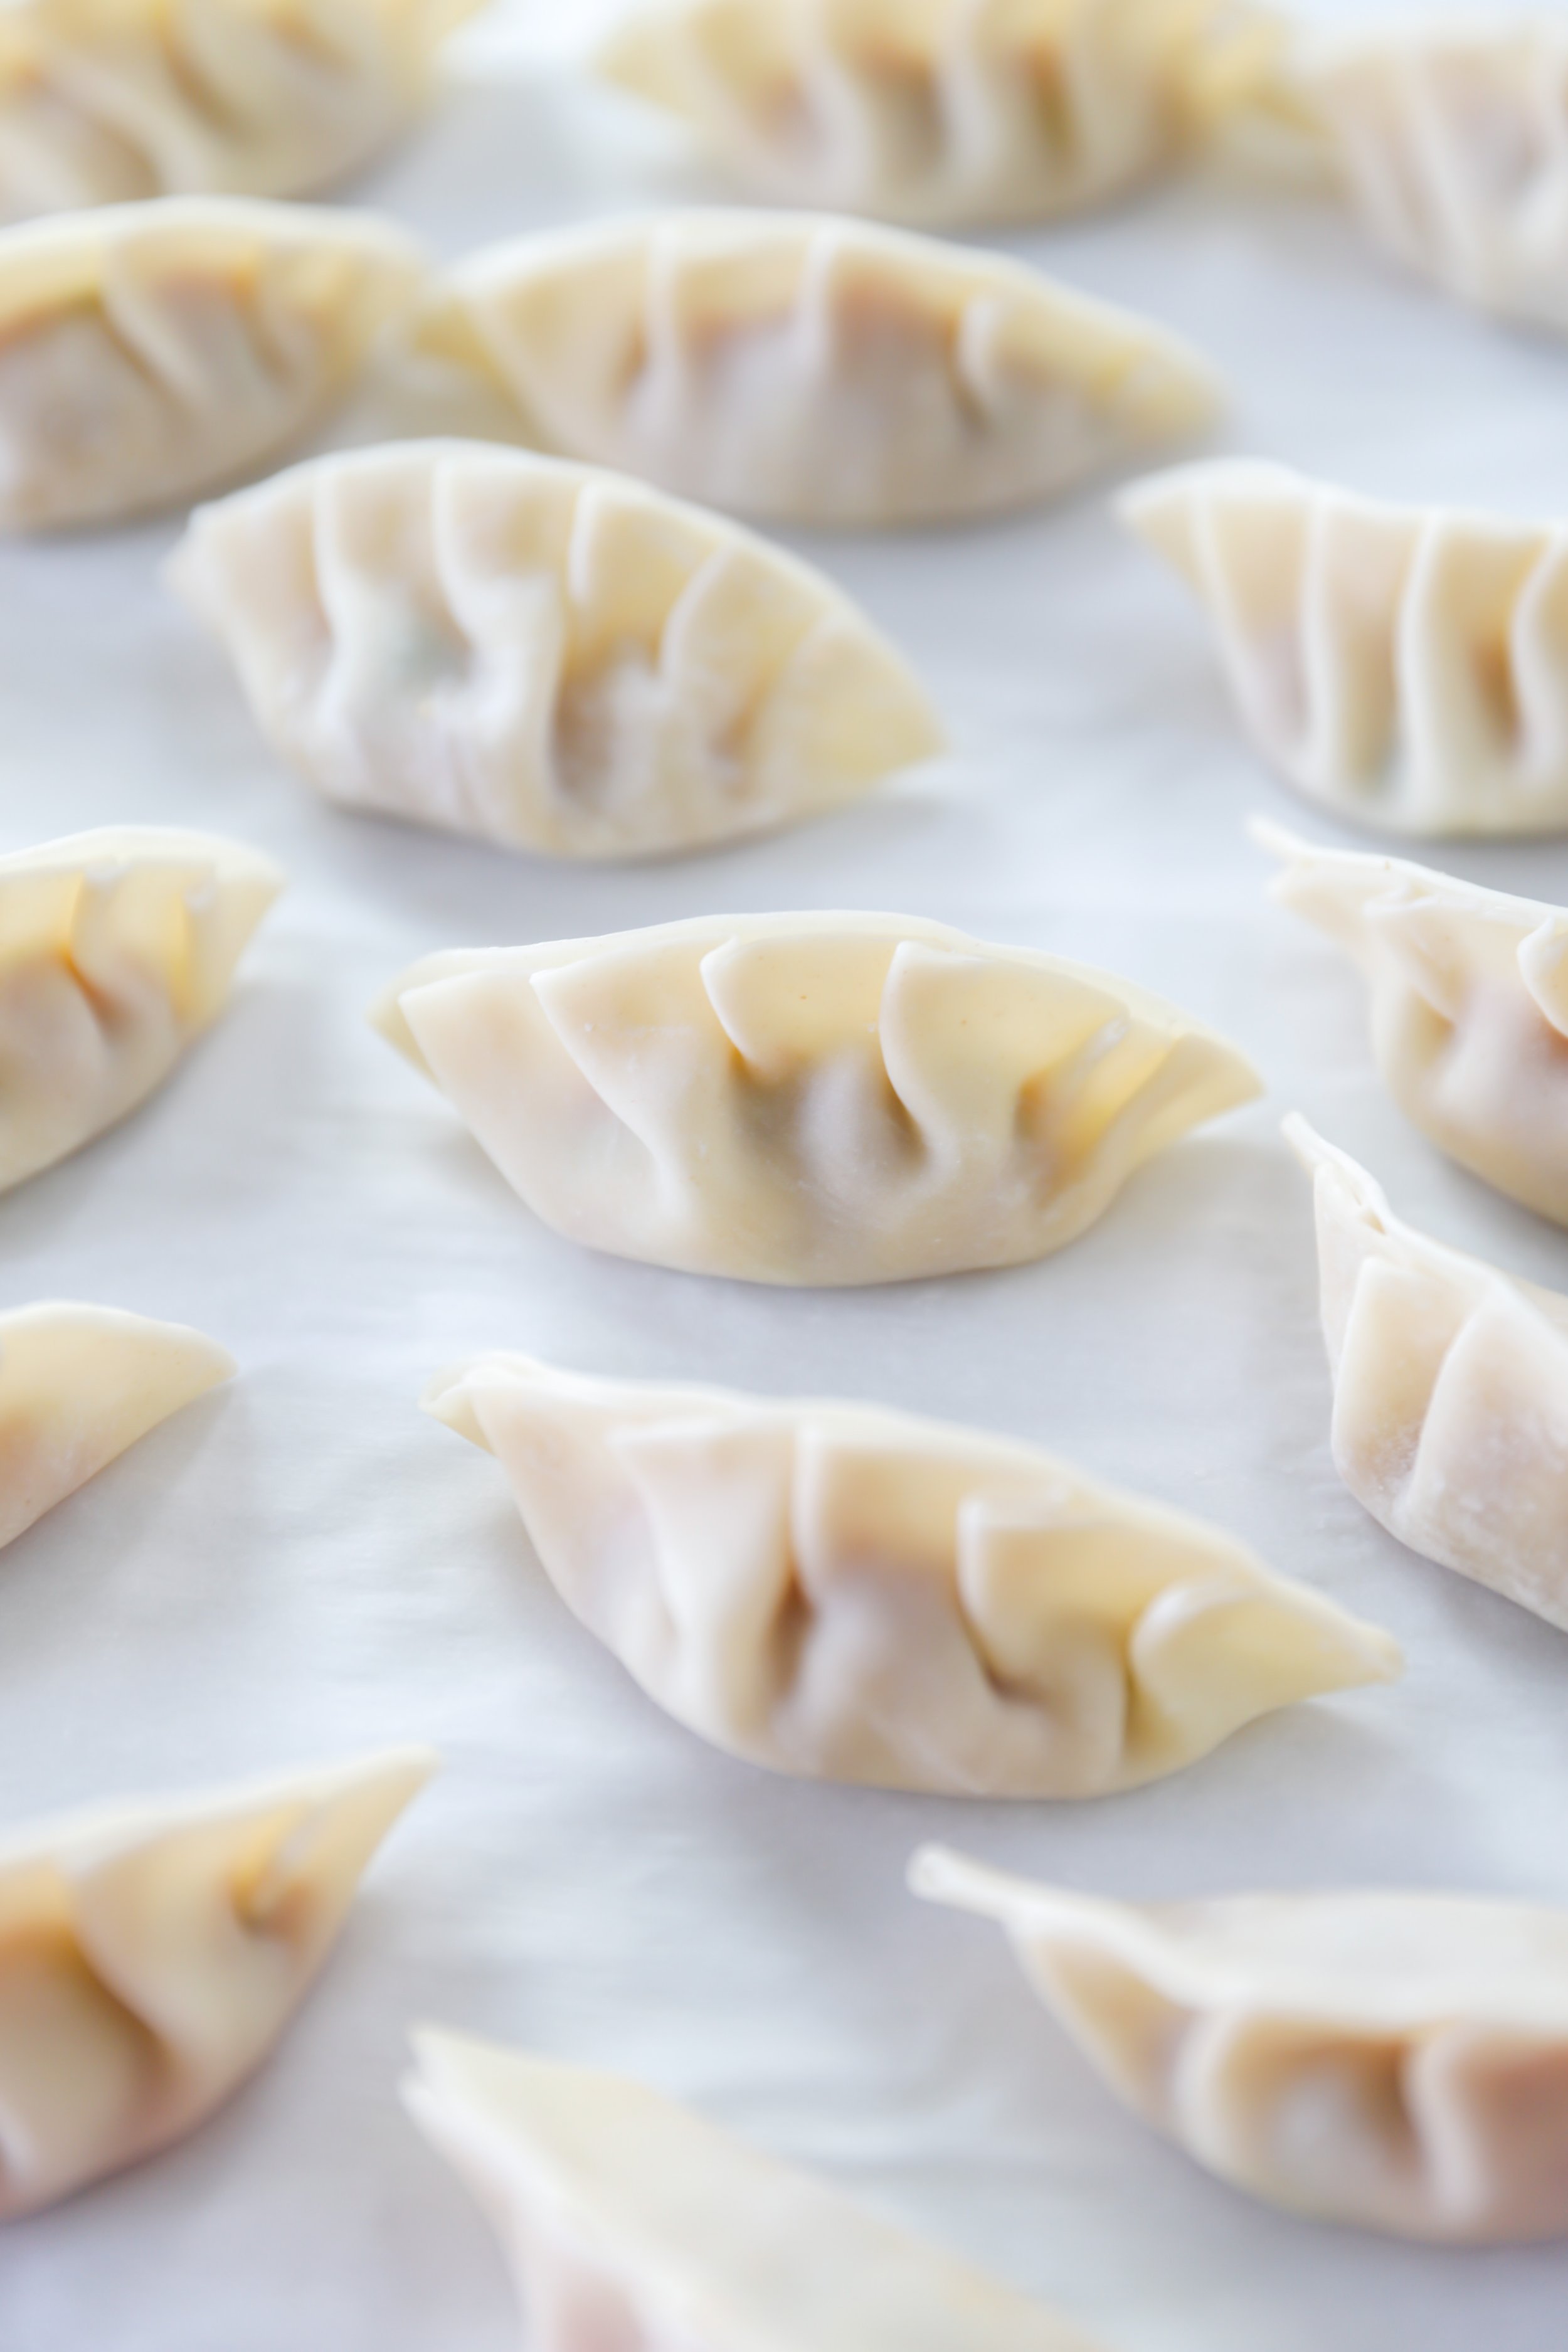
  1. Fully prepare the dumplings but do not cook them.
  2. Place them in a single layer on a baking sheet.
  3. Freeze for 1 to 2 hours until solid.
  4. Transfer to a freezer safe zip top bag.

They will stay fresh in the freezer for up to 3 months.

How to Cook Frozen Dumplings

No need to thaw them.

Cook frozen dumplings the same way you would cook fresh dumplings, but add 5 to 8 extra minutes during the steaming step.

FAQs

What are dumplings vs potstickers?

Dumplings can be boiled, steamed, or pan fried. Potstickers are dumplings cooked using the pan fry and steam method, which creates a crispy bottom.

Can I make pork dumplings ahead of time?

Yes. These are perfect for prepping ahead. You can refrigerate uncooked dumplings for up to 24 hours or freeze them for up to 3 months.

Do I need to cook napa cabbage first?

No, not for this recipe. Thinly slicing it helps it cook perfectly inside the dumpling.

Can I use store bought dumpling wrappers?

Yes, and I highly recommend it. Shanghai style wrappers work great for this recipe.

Homemade pork dumplings filled with napa cabbage, ginger, and garlic on parchment paper

Homemade Pork Dumplings (Potstickers) with Napa Cabbage

These homemade pork dumplings are filled with napa cabbage, ginger, garlic, and sesame flavor, then pan fried and steamed until perfectly crispy and juicy.
Print Pin
Prep Time 30 minutes mins
Cook Time 10 minutes mins
Servings 42

Ingredients  

  • 1/2 lb ground pork
  • 4 garlic cloves minced
  • 1/2 inch ginger minced
  • 1 egg
  • 4 napa cabbage leaves thinly sliced (white stems removed)
  • 1 green onion thinly sliced
  • 1 1/2 tbsp soy sauce
  • 1 tbsp sesame oil
  • 1/2 tsp salt
  • 1/4 tsp white pepper
  • Dumpling wrappers (Shanghai style recommended)

Method 

Prevent your screen from going dark
  • In a large mixing bowl, combine ground pork, minced garlic, minced ginger, egg, sliced napa cabbage, green onion, soy sauce, sesame oil, salt, and white pepper. Mix until fully combined.
  • Lay parchment paper on the counter or set out a baking sheet. Prepare your dumpling wrappers, filling, and a small bowl of water for sealing. Keep unused wrappers covered so they do not dry out.
  • Place one dumpling wrapper on your work surface. Add about 1 teaspoon of filling to the center. Dip your finger in water and lightly wet the edges of the wrapper.
  • Fold the wrapper in half into a half moon shape. Create pleats along one side, pressing them into the other side, until fully sealed. Repeat with remaining wrappers and filling.
  • Heat 1 tablespoon oil in a large nonstick skillet over medium heat. Add dumplings in a single layer, working in batches if needed. Cook for 3 to 4 minutes, or until the bottoms are golden brown.
  • Carefully add about 1/3 cup water to the skillet. Immediately cover with a lid and steam for 5 minutes, or until the filling is cooked through and the wrappers look slightly translucent.
  • Remove dumplings from the pan and serve warm with dipping sauce.
Start Cooking

Notes

Dumpling Dipping Sauce 

This is my favorite simple dipping sauce combo:
  • Soy sauce
  • Black vinegar
  • Honey
  • Sesame oil
It is salty, tangy, slightly sweet, and so good with crispy dumplings.

welcome!

Hi I’m Meg!


Food and family are my passions and I love to connect people together around a good meal!

More about me

Newest Recipe

  • Classic Layered Salad (Easy Make Ahead Side!)
    Salads

    Classic Layered Salad (Easy Make Ahead Side!)

Please enable JavaScript in your browser to complete this form.
Loading

Popular Recipes

  • Classic Layered Salad (Easy Make Ahead Side!)
    Salads

    Classic Layered Salad (Easy Make Ahead Side!)

  • Lucky Charms Cheesecake (No Bake Cookie Dough Dessert)
    Dessert

    Lucky Charms Cheesecake (No Bake Cookie Dough Dessert)

  • Copycat Nothing Bundt Cake Chocolate Chocolate Chip Cake Recipe
    Cakes

    Copycat Nothing Bundt Cake Chocolate Chocolate Chip Cake Recipe

  • Sheet Pan Sausage and Pepper Grinder Subs
    Dinner

    Sheet Pan Sausage and Pepper Grinder Subs

Let’s Connect

  • Facebook
  • Instagram
  • TikTok
  • Pinterest

Shop with me

Bright yellow manual citrus press for squeezing fresh citrus juice.
Gold stainless steel salad serving spoon and fork set.
Footed trifle bowl with layered strawberry shortcake dessert.
Stock photo of 9 inch springform pan.
Shop my favorites

Rate and review

What did you think? Cancel reply

Recipe Rating


You may also love

Authentic Pork Egg Rolls Recipe - Appetizers
Appetizers

Authentic Pork Egg Rolls Recipe

Crispy Sesame Chicken (Better Than Takeout!) - Dinner
Dinner

Crispy Sesame Chicken (Better Than Takeout!)

Authentic Hot and Sour Soup (PoPo’s Classic Recipe) - Appetizers
Appetizers

Authentic Hot and Sour Soup (PoPo’s Classic Recipe)

Join me on socials

Layered salad 🥗 Crisp, creamy, and hits every time Layered salad 🥗 Crisp, creamy, and hits every time! Perfect for spring gatherings, summer bbqs, or anytime you need a fresh & delicious side

📌 SAVE for the next time you need an easy side 🤍
💬 Comment RECIPE and I’ll send it to you!

INGREDIENTS 
6 cups romaine lettuce chopped (about 3 small heads)
1 small red onion, diced
2 cups frozen peas, defrosted
1 red bell pepper, chopped
7 hard boiled eggs, sliced
1 lb thick cut bacon, cooked and chopped
1 1/2 cups cheddar or colby jack cheese, freshly shredded

DRESSING
1/2 cup mayonnaise
1/2 cup sour cream
1/2 tbsp sugar
1 1/2 tbsp apple cider vinegar
Salt and pepper to taste

INSTRUCTIONS 
Add chopped romaine lettuce to the bottom of a trifle bowl or large glass bowl.

Layer red onion, red bell pepper, and peas around the edges so they are visible from the outside.

Press sliced eggs against the glass for a layered look. Chop the remaining eggs and add them to the center to fill it in evenly.

In a medium bowl, mix together mayonnaise, sour cream, sugar, apple cider vinegar, salt, and pepper until smooth. Spoon the dressing into the center, then gently spread it outward to seal the top.

Sprinkle shredded cheese evenly over the dressing, then top with chopped bacon.

#salad #layeredsalad #sidedish #saladrecipe
Okay I know Easter is basically over… but you need Okay I know Easter is basically over… but you need to save this for next year 🐰✝️ Or honestly, just make it all spring long 🌸

My dad (who doesn’t bake at all) made this cake when I was little, and it’s one of my fav core Easter memories 🤍 It’s so cute, fun to get kids involved with, and instantly makes everything feel a little more fun and special!

INSTRUCTIONS:
Bake your favorite cake in two 8-inch round pans. Let them cool completely, then wrap and freeze for easier cutting.

Keep one cake whole for the face. Cut the second cake to create the ears and bow tie, then arrange everything on a platter.

Frost with white icing and cover with shredded coconut (leave a little space in the ears for pink frosting). 

Decorate with gumdrops, jelly beans, fruit punch straws, or whatever candy you have on hand!

SAVE this for spring or next Easter 🐰

#bunnycake #easter #cake
everything was fun and easy… until 5 😅🤡 #springbr everything was fun and easy… until 5 😅🤡

#springbreak #momlife #family #vacation
Enjoying My Ultimate Game Day Meal thanks to @ship Enjoying My Ultimate Game Day Meal thanks to @shipt 🏀 Use my code MEG10 to get $10 off your next Meijer order of $35 or more!

#gamedayfood #hosting #chickenfingers #shiptpartner 

INGREDIENTS:

Chicken Marinade
1 1/2 lbs chicken breast, sliced into tenders
1 1/2 cups whole milk
1 1/2 tbsp lemon juice
1/2 tbsp garlic powder
1/2 tbsp onion powder
1/2 tbsp paprika
1 tsp salt
1 tsp black pepper

Seasoned Flour Coating
1 1/2 cups all purpose flour
1/2 cup cornstarch
1 tsp garlic powder
1 tsp salt
1/2 tsp paprika
1/2 tsp black pepper

Sauce
1/2 cup mayonnaise
1/4 cup ketchup
2 tsp Worcestershire sauce
1/2 tsp garlic powder
1 tsp cracked black pepper
Salt, to taste

Oil for frying
For Serving: French fries, Texas toast, and coleslaw

Instructions:
In a large bowl, combine the chicken and all marinade ingredients. Mix well, cover, and refrigerate overnight.

In another bowl, whisk together all seasoned flour coating ingredients. Remove the chicken from the marinade, allowing excess liquid to drip off. Dredge each piece in the seasoned flour coating, pressing firmly to coat. Lift and gently shake off excess flour, then place on a wire rack set over a sheet pan.

Let the chicken rest for 5 minutes, then dredge again in the seasoned flour coating. Return to the rack and let sit for another 15 minutes. This helps create that extra crispy texture.

In a small bowl, mix all sauce ingredients together and refrigerate until ready to use.

Heat oil in a heavy bottom pan to 350°F. Fry the chicken in batches, being careful not to overcrowd the pan. Cook for about 3 minutes per side, or until golden brown, crispy, and fully cooked.

Serve with sauce, French fries, Texas toast, and coleslaw.
simple but so freakin good ☀️ #highproteinsnack # simple but so freakin good ☀️

#highproteinsnack #hardboiledeggs #snack

Follow My Pinterest

@megsescapades

Follow My Instagram

@megsescapades

Follow My TikTok

@megsescapades

Stay in the know

Please enable JavaScript in your browser to complete this form.
Loading
  • Recipes
  • About
  • Contact
  • Shop

Easy family recipes, holiday favorites, and approachable meals for gathering around the table.

Terms & Conditions | Privacy Policy

Copyright ©2026 Meg’s Escapades | All rights reserved |
Website by Saevil Row and MTT

Homemade Pork Dumplings (Potstickers) with Napa Cabbage

Homemade Pork Dumplings (Potstickers) with Napa Cabbage

Ingredients

  • 1/2 lb ground pork
  • 4 garlic cloves (minced)
  • 1/2 inch ginger (minced)
  • 1 egg
  • 4 napa cabbage leaves (thinly sliced (white stems removed))
  • 1 green onion (thinly sliced)
  • 1 1/2 tbsp soy sauce
  • 1 tbsp sesame oil
  • 1/2 tsp salt
  • 1/4 tsp white pepper
  • Dumpling wrappers ((Shanghai style recommended))
1
In a large mixing bowl, combine ground pork, minced garlic, minced ginger, egg, sliced napa cabbage, green onion, soy sauce, sesame oil, salt, and white pepper. Mix until fully combined.
2
Lay parchment paper on the counter or set out a baking sheet. Prepare your dumpling wrappers, filling, and a small bowl of water for sealing. Keep unused wrappers covered so they do not dry out.
3
Place one dumpling wrapper on your work surface. Add about 1 teaspoon of filling to the center. Dip your finger in water and lightly wet the edges of the wrapper.
4
Fold the wrapper in half into a half moon shape. Create pleats along one side, pressing them into the other side, until fully sealed. Repeat with remaining wrappers and filling.
5
Heat 1 tablespoon oil in a large nonstick skillet over medium heat. Add dumplings in a single layer, working in batches if needed. Cook for 3 to 4 minutes, or until the bottoms are golden brown.
6
Carefully add about 1/3 cup water to the skillet. Immediately cover with a lid and steam for 5 minutes, or until the filling is cooked through and the wrappers look slightly translucent.
7
Remove dumplings from the pan and serve warm with dipping sauce.

Hope you enjoyed cooking this recipe!

Please rate this recipe to help others find it.

step 1 of 7