Skip to content
Meg's Escapades
  • Recipes
  • About
  • Contact
  • Shop

I’m looking for

  • All Recipes
  • Appetizers
  • Salads
  • Breakfast + Brunch
  • Dessert
  • Breakfast
  • Dinner
  • Grilling
  • Bread
  • Side Dishes
  • Soups + Stews

Popular recipes

Strawberry Tiramisu (No-Bake & Perfect for Summer)

Bagel Charcuterie Board

Best Lemon Bars Recipe (Soft, Buttery & Bright)

Creamy Mashed Potatoes

Recipes
  • All Recipes
  • Appetizers
  • Salads
  • Breakfast
  • Dessert
  • Dinner
  • Grilling
  • Side Dishes

Popular Recipes

Strawberry Tiramisu (No-Bake & Perfect for Summer)

Strawberry Tiramisu (No-Bake & Perfect for Summer)

Bagel Charcuterie Board

Bagel Charcuterie Board

Best Lemon Bars Recipe (Soft, Buttery & Bright)

Best Lemon Bars Recipe (Soft, Buttery & Bright)

Creamy Mashed Potatoes

Creamy Mashed Potatoes

About
Contact
Shop
Angled shot of eggnog cheesecake bars arranged on a platter with whipped cream swirls.
RecipesDessert

Eggnog Cheesecake Bars

By Meaghan SmithDecember 23, 2025
Angled shot of eggnog cheesecake bars arranged on a platter with whipped cream swirls.
Prep Time 20 minutes mins
Cook Time 50 minutes mins
Servings 12

Eggnog Cheesecake Bars are creamy holiday dessert squares with a gingerbread cookie crust, a smooth eggnog filling, and a swirl of whipped cream on top. They have a rich, velvety texture and a festive flavor that’s perfect for holiday gatherings.

Jump to Recipe
Jump to Video
  • Facebook
  • Email
  • Print

These Eggnog Cheesecake Bars bring together everything you love about the holidays in one creamy and cozy bite. They start with a crunchy gingerbread cookie crust, a silky eggnog infused cheesecake filling, and a soft swirl of whipped cream on top that makes them look just as festive as they taste. If you love cheesecake but want something simple, festive, and easy to serve at parties, these bars are the perfect choice.

The texture is smooth and rich, the crust brings warm spice, and the eggnog adds the sweetest hint of holiday cheer. They slice beautifully which makes them a great addition to cookie boxes, dessert platters, and family gatherings. Once you try them, they may become your new Christmas signature dessert.
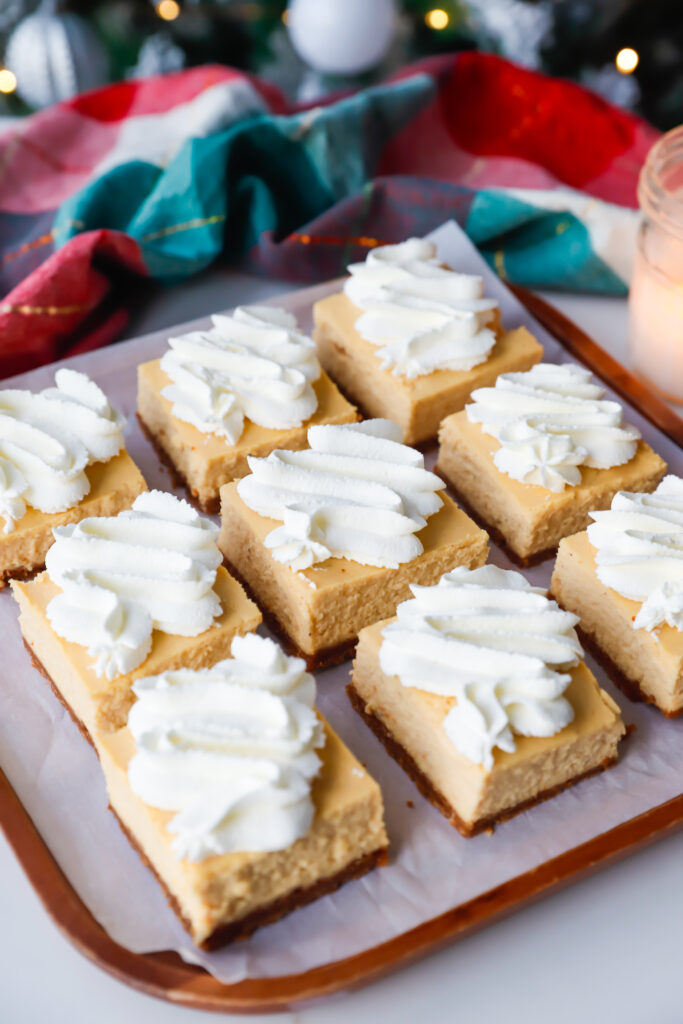
Angled shot of eggnog cheesecake bars arranged on a platter with whipped cream swirls.

Why You Will Love These Cheesecake Bars

  • Whipped cream adds a soft bakery style finish that looks beautiful.
  • Gingerbread crust gives warm, spiced holiday flavor.
  • Eggnog makes the cheesecake extra creamy and smooth.
  • Easier and faster than a full cheesecake.
  • Perfect for Christmas parties, cookie exchanges, and gifting.
  • Make ahead friendly since they chill overnight.
Close up of an eggnog cheesecake bar showing the gingerbread crust, creamy eggnog filling, and whipped cream swirls.

When To Make These Eggnog Cheesecake Bars

  • Christmas Eve or Christmas Day
  • Holiday potlucks
  • Cookie exchanges
  • Office parties
  • Festive weekend baking
  • Anytime you want a cozy, nostalgic dessert
Overhead shot of festive eggnog cheesecake bars arranged on a serving board for Christmas.

Tips for the Creamiest Bars

These simple steps help ensure your cheesecake bars turn out smooth and velvety every time.

  • Use room temperature cream cheese for a lump free filling.
  • Mix on low speed and avoid over beating once the eggs are added.
  • Tap the pan gently before baking to release any air bubbles.
  • Bake until the edges look set and the center still has a gentle wobble.
  • For the cleanest look, cool fully and refrigerate overnight before cutting into bars.
Angled shot of eggnog cheesecake bars arranged on a platter with gingerbread crust, velvety cheesecake, and whipped cream swirls.

Ingredient Spotlight

Eggnog

Eggnog adds a sweet, creamy base and warm spice flavor that blends beautifully with cream cheese. It creates the velvety texture that cheesecake is known for and gives these bars their unmistakable holiday taste. Even a small amount adds depth and richness to the filling.

Gingerbread Cookies

Gingerbread cookies bring crunch, warm spice, and molasses depth that pair perfectly with eggnog. They create a flavorful, festive crust that instantly makes the bars taste like Christmas. This crust is simple to prepare but adds a huge holiday payoff in both flavor and aroma.

FAQs

Can I use store bought eggnog for this recipe?

Yes. Any regular eggnog works well in the filling since it blends smoothly with the cream cheese and adds a sweet holiday flavor. Avoid low fat eggnog because it does not set as well.

How do I know when the cheesecake bars are done baking?

The edges should look set and the center should have a gentle jiggle when the pan is shaken. If the center is fully firm, the bars may be overbaked.

What can I use instead of gingerbread cookies for the crust?

You can use graham crackers or Biscoff cookies. Both pair well with the eggnog flavor and bake into a sturdy crust.

Can I use vanilla instead of almond extract in the whipped cream?

Yes. Vanilla creates a classic flavor. Almond extract adds a bakery style note that pairs beautifully with the eggnog filling.

Why did my cheesecake crack?

Cheesecake can crack if it is overmixed or overbaked. The good news is that whipped cream hides any imperfections and still gives the bars a beautiful finish.

Can I freeze Eggnog Cheesecake Bars?

Yes. Freeze them without the whipped cream for up to two months. Thaw overnight in the refrigerator, then add the whipped cream before serving.

If you want more Holiday dessert ideas, try these next:

  • Chocolate Peppermint Crinkle Cookies
  • Pecan Tassies
  • Apple Pie Bars
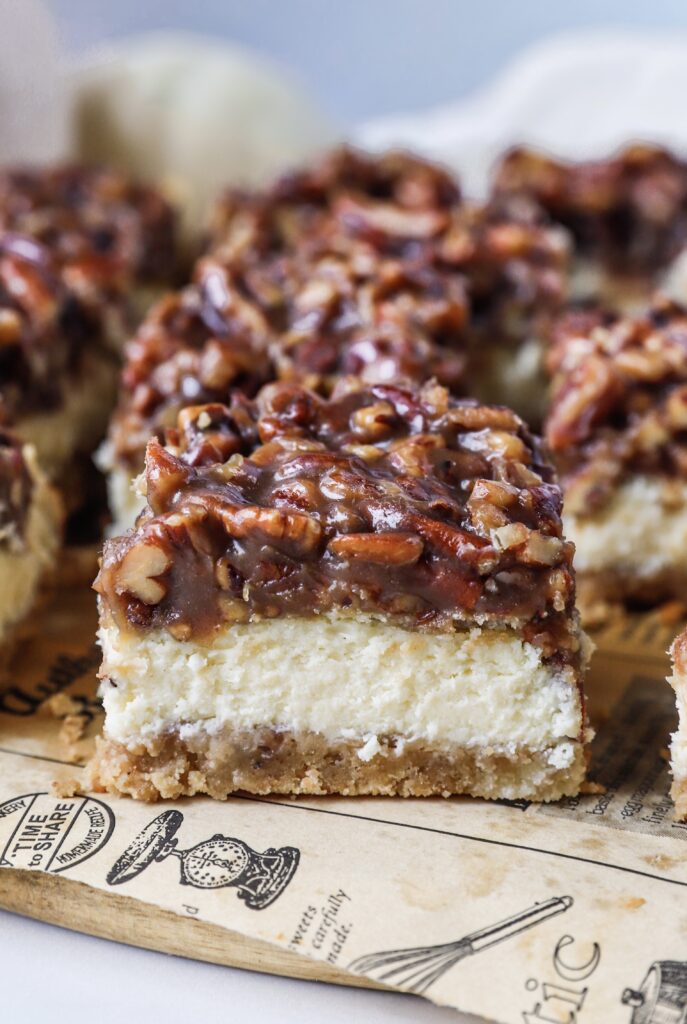
  • Pecan Pie Cheesecake Bars
  • Snowman Cake Pops
Angled shot of eggnog cheesecake bars arranged on a platter with whipped cream swirls.

Eggnog Cheesecake Bars

Eggnog Cheesecake Bars are creamy holiday dessert squares with a gingerbread cookie crust, a smooth eggnog filling, and a swirl of whipped cream on top. They have a rich, velvety texture and a festive flavor that is perfect for holiday gatherings.
Print Pin
Prep Time 20 minutes mins
Cook Time 50 minutes mins
Servings 12

Ingredients  

Gingerbread Crust

  • 1 (10 oz) package gingerbread cookies finely crushed
  • 5 tbsp unsalted butter melted
  • 2 tbsp brown sugar

Cheesecake Filling

  • 24 oz cream cheese softened
  • 3/4 cup brown sugar
  • 3 large eggs room temperature
  • 1 tsp pure vanilla extract
  • 1/2 tsp nutmeg
  • 3/4 cup eggnog room temperature
  • 1 1/2 tbsp cornstarch

Whipped Cream Topping

  • 1 cup heavy whipping cream cold
  • 2 tbsp powdered sugar
  • 1/4 tsp almond extract

Method 

Prevent your screen from going dark
  • Preheat oven to 350 F. Line a 9×9 baking pan with parchment paper, leaving an overhang.
  • Mix the crushed gingerbread cookies, melted butter, and brown sugar until it resembles wet sand. Press firmly into the bottom of the pan. Bake for 8 minutes, then let cool slightly.
  • Reduce oven temperature to 325 F.
  • Beat cream cheese until smooth. Add brown sugar and mix until creamy. Scrap down the sides and mix for another 15 seconds. On low speed, add eggs one at a time, mixing until combined before adding the next egg. Stir in vanilla and nutmeg.
  • In a measuring cup or bowl, whisk the eggnog and cornstarch together until smooth. Slowly pour into the cream cheese mixture and mix just until combined.
  • Pour the filling over the crust. Bake for 40 to 50 minutes or until the edges look set and the center has a gentle jiggle. Do not overbake.
  • Cool to room temperature, then refrigerate for at least 4 hours, however I highly recommend overnight.
  • Make the whipped cream: Whip heavy cream, powdered sugar, and almond extract until stiff peaks form. Transfer to a piping bag with a Wilton 2D tip. Slice into bars and top with piped whipped cream.
Start Cooking

welcome!

Hi I’m Meg!


Food and family are my passions and I love to connect people together around a good meal!

More about me

Newest Recipe

  • Strawberry Tiramisu (No-Bake & Perfect for Summer)
    Dessert

    Strawberry Tiramisu (No-Bake & Perfect for Summer)

  • Bagel Charcuterie Board
    Breakfast

    Bagel Charcuterie Board

  • Best Lemon Bars Recipe (Soft, Buttery & Bright)
    Dessert

    Best Lemon Bars Recipe (Soft, Buttery & Bright)

  • Classic Layered Salad (Easy Make Ahead Side!)
    Salads

    Classic Layered Salad (Easy Make Ahead Side!)

Please enable JavaScript in your browser to complete this form.
Loading

Popular Recipes

  • Strawberry Tiramisu (No-Bake & Perfect for Summer)
    Dessert

    Strawberry Tiramisu (No-Bake & Perfect for Summer)

  • Bagel Charcuterie Board
    Breakfast

    Bagel Charcuterie Board

  • Best Lemon Bars Recipe (Soft, Buttery & Bright)
    Dessert

    Best Lemon Bars Recipe (Soft, Buttery & Bright)

  • Classic Layered Salad (Easy Make Ahead Side!)
    Salads

    Classic Layered Salad (Easy Make Ahead Side!)

  • Lucky Charms Cheesecake (No Bake Cookie Dough Dessert)
    Dessert

    Lucky Charms Cheesecake (No Bake Cookie Dough Dessert)

  • Copycat Nothing Bundt Cake Chocolate Chocolate Chip Cake Recipe
    Cakes

    Copycat Nothing Bundt Cake Chocolate Chocolate Chip Cake Recipe

  • Sheet Pan Sausage and Pepper Grinder Subs
    Dinner

    Sheet Pan Sausage and Pepper Grinder Subs

Let’s Connect

  • Facebook
  • Instagram
  • TikTok
  • Pinterest

Shop with me

Bright yellow manual citrus press for squeezing fresh citrus juice.
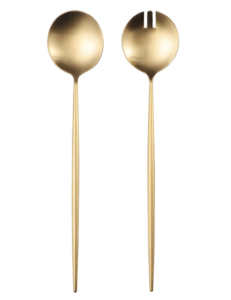
Gold stainless steel salad serving spoon and fork set.
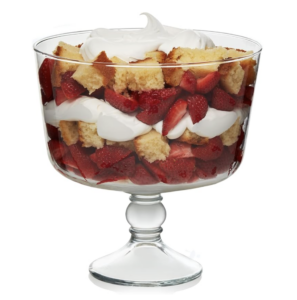
Footed trifle bowl with layered strawberry shortcake dessert.
Stock photo of 9 inch springform pan.
Shop my favorites

Rate and review

What did you think? Cancel reply

Recipe Rating


You may also love

Lucky Charms Cheesecake (No Bake Cookie Dough Dessert) - Dessert
Dessert

Lucky Charms Cheesecake (No Bake Cookie Dough Dessert)

Pecan Pie Cheesecake Bars - Dessert
Dessert

Pecan Pie Cheesecake Bars

Best Lemon Bars Recipe (Soft, Buttery & Bright) - Dessert
Dessert

Best Lemon Bars Recipe (Soft, Buttery & Bright)

Join me on socials

@megsescapades Sausage & Cheese Tartlets! 🧀 Made w @megsescapades Sausage & Cheese Tartlets! 🧀 Made with savory sausage, melty cheese, and a golden, flaky crust. These bite sized treats will disappear quickly!

📌 SAVE for an easy appetizer 
💬 Comment RECIPE for a printable copy in your DMs

INGREDIENTS: 
1 tsp avocado oil
1 lb mild or hot Italian ground sausage
3 tsp ranch seasoning (from a ranch packet)
1 cup sour cream
1 cup Monterey Jack cheese (4 ounces freshly grated)
1 cup Colby Jack cheese (4 ounces freshly grated)
2 pie dough disks (store-bought or homemade)

INSTRUCTIONS:
Preheat your oven to 375°F (190°C).

Use a small biscuit cutter (about 2–2.5 inches) to cut out 38-40 circles from your pie dough. Place them into mini muffin tins, gently pressing down to fit.

In a skillet, heat avocado oil over medium heat. Add the Italian sausage, breaking it up into crumbles. Cook until the sausage is browned and no longer pink. Remove from heat and drain any excess oil.

Combine the cooked sausage with 3 tsp of ranch seasoning, sour cream, and the freshly grated Monterey Jack and Colby Jack cheeses. Stir until everything is well combined.

Spoon the sausage and cheese mixture into the prepared pie crusts in the muffin tins, filling them to the top.

Bake the tartlets for 12-15 minutes or until the pie dough is golden and the cheese is bubbly. Let the tartlets cool for a minute, then carefully remove them from the muffin tins. Serve warm, and enjoy these savory bites!

#easyrecipe #tarts #brunchideas #appetizer #sausageandcheese
@megsescapades Limoncello Spritz by the Pitcher 🍋🥂 @megsescapades Limoncello Spritz by the Pitcher 🍋🥂 It’s bright, bubbly, and unapologetically fun.  Made by the pitcher to scale for any size gathering

📌 SAVE for your fav summer sips
💬 Comment RECIPE and I’ll send you a DM

INGREDIENTS:
750 ml Prosecco (1 full bottle), chilled
2 cups Limoncello, chilled
1 cup sparkling water, I used lemon sparkling water
Ice
Fresh lemon slices and mint for garnish (optional)

INSTRUCTIONS:
In a large pitcher, combine chilled Prosecco, Limoncello, and sparkling water.

Add ice and lemon slices.

Pour into glasses over ice and garnish with another lemon slice and fresh mint if you like.

#limoncellospritz #limoncello #summercocktail #spritz #spritzseason
@megsescapades Strawberry Tiramisu 🍓🍰 Layers of ja @megsescapades Strawberry Tiramisu 🍓🍰 Layers of jam swirled mascarpone, sweet strawberries, and soft ladyfingers… it chills while you chill, and gets even better the next day ☀️

📌 SAVE for an easy no bake dessert
💬 Comment RECIPE & I’ll send you a DM

INGREDIENTS:
STRAWBERRY LAYER
2 lbs fresh strawberries hulled and sliced
1/2 cup sugar
1 lemon juiced
2 tsp vanilla extract

MASCARPONE CREAM
2 cups cold heavy whipping cream
16 oz mascarpone cheese softened
2/3 cup powdered sugar
2 tsp vanilla extract

TO ASSEMBLE
14 oz ladyfinger cookies (Savoiardi)
1/2 cup strawberry jam or preserves (optional but delicious)
Extra strawberries for topping

Prep the Strawberries:
In a large bowl, combine the sliced strawberries, sugar, lemon juice, and vanilla. Let sit for 15-30 minutes until juicy.

Make the Mascarpone Cream:
In a large mixing bowl, whip the heavy cream, powdered sugar, and vanilla until stiff peaks form. In a separate bowl, gently mix mascarpone until smooth, then fold the whipped cream into the mascarpone until light and fluffy.�
Assemble the Layers:
Lightly dip each ladyfinger into the strawberry syrup (just a quick dunk, don’t soak!)��Arrange a full layer of ladyfingers in the bottom of a 9×13 inch dish. You may need to cut some of the ladyfingers to fit.��Spread half the mascarpone cream over the ladyfingers.��Spoon strawberry jam swirls over the cream (optional but adds amazing flavor), then layer on the macerated strawberries, saving a few spoonfuls to serve on the side.��Repeat the layers: dipped ladyfingers, remaining mascarpone cream, and more strawberry jam swirls for decoration on top.

Chill at least 6 hours before serving, overnight is even better! Garnish with extra sliced strawberries when ready to serve.

Please LIKE, SAVE, and FOLLOW for more easy recipes ✨�
#strawberrydessert #strawberrytiramisu #nobakedessert #easyrecipe
Life lately…🤍 The past couple weeks have been ful Life lately…🤍

The past couple weeks have been full in the best way. Between kids’ sports, family time, and having my Grandma here (she’s 88 and visiting from New Jersey), I just wanted to slow down and really be present for it all.

A lot of real life, a lot of good food, and a lot of moments I didn’t want to rush through.

I’ve missed being on here and sharing with you. Easing back in this week and excited to share more 🫶🏼

PS: LAST SLIDE IS my Great Grandma’s plum cake recipe!!
Layered salad 🥗 Crisp, creamy, and hits every time Layered salad 🥗 Crisp, creamy, and hits every time! Perfect for spring gatherings, summer bbqs, or anytime you need a fresh & delicious side

📌 SAVE for the next time you need an easy side 🤍
💬 Comment RECIPE and I’ll send it to you!

INGREDIENTS 
6 cups romaine lettuce chopped (about 3 small heads)
1 small red onion, diced
2 cups frozen peas, defrosted
1 red bell pepper, chopped
7 hard boiled eggs, sliced
1 lb thick cut bacon, cooked and chopped
1 1/2 cups cheddar or colby jack cheese, freshly shredded

DRESSING
1/2 cup mayonnaise
1/2 cup sour cream
1/2 tbsp sugar
1 1/2 tbsp apple cider vinegar
Salt and pepper to taste

INSTRUCTIONS 
Add chopped romaine lettuce to the bottom of a trifle bowl or large glass bowl.

Layer red onion, red bell pepper, and peas around the edges so they are visible from the outside.

Press sliced eggs against the glass for a layered look. Chop the remaining eggs and add them to the center to fill it in evenly.

In a medium bowl, mix together mayonnaise, sour cream, sugar, apple cider vinegar, salt, and pepper until smooth. Spoon the dressing into the center, then gently spread it outward to seal the top.

Sprinkle shredded cheese evenly over the dressing, then top with chopped bacon.

#salad #layeredsalad #sidedish #saladrecipe

Follow My Pinterest

@megsescapades

Follow My Instagram

@megsescapades

Follow My TikTok

@megsescapades

Stay in the know

Please enable JavaScript in your browser to complete this form.
Loading
  • Recipes
  • About
  • Contact
  • Shop

Easy family recipes, holiday favorites, and approachable meals for gathering around the table.

Terms & Conditions | Privacy Policy

Copyright ©2026 Meg’s Escapades | All rights reserved |
Website by Saevil Row and MTT

Eggnog Cheesecake Bars

Eggnog Cheesecake Bars

Ingredients

Gingerbread Crust
  • 1 (10 oz) package gingerbread cookies (finely crushed)
  • 5 tbsp unsalted butter (melted)
  • 2 tbsp brown sugar
Cheesecake Filling
  • 24 oz cream cheese (softened)
  • 3/4 cup brown sugar
  • 3 large eggs (room temperature)
  • 1 tsp pure vanilla extract
  • 1/2 tsp nutmeg
  • 3/4 cup eggnog (room temperature)
  • 1 1/2 tbsp cornstarch
Whipped Cream Topping
  • 1 cup heavy whipping cream (cold)
  • 2 tbsp powdered sugar
  • 1/4 tsp almond extract
1
Preheat oven to 350 F. Line a 9x9 baking pan with parchment paper, leaving an overhang.
2
Mix the crushed gingerbread cookies, melted butter, and brown sugar until it resembles wet sand. Press firmly into the bottom of the pan. Bake for 8 minutes, then let cool slightly.
3
Reduce oven temperature to 325 F.
4
Beat cream cheese until smooth. Add brown sugar and mix until creamy. Scrap down the sides and mix for another 15 seconds. On low speed, add eggs one at a time, mixing until combined before adding the next egg. Stir in vanilla and nutmeg.
5
In a measuring cup or bowl, whisk the eggnog and cornstarch together until smooth. Slowly pour into the cream cheese mixture and mix just until combined.
6
Pour the filling over the crust. Bake for 40 to 50 minutes or until the edges look set and the center has a gentle jiggle. Do not overbake.
7
Cool to room temperature, then refrigerate for at least 4 hours, however I highly recommend overnight.
8
Make the whipped cream: Whip heavy cream, powdered sugar, and almond extract until stiff peaks form. Transfer to a piping bag with a Wilton 2D tip. Slice into bars and top with piped whipped cream.

Hope you enjoyed cooking this recipe!

Please rate this recipe to help others find it.

step 1 of 8